Global Settings
The Global Settings panel provides centralized configuration for your Autonify platform, allowing administrators and owners to manage user profiles, system configurations, integrations, and AI model settings.
📹 Global Settings Overview
Learn how to manage your profile, configure system settings, and customize platform behavior in Autonify.
Accessing Global Settings
The Global Settings panel is accessible to all users, with different sections available based on your role:
- Click on the Settings icon in the top navigation bar
- The Settings page opens with multiple tabs based on your permissions
Role-Based Access
- All Users: Can access Profile settings
- Admin/Owner Only: Additional access to System, MCP, and Prompts tabs
![]() The Settings icon appears in the navigation bar for authorized users
The Settings icon appears in the navigation bar for authorized users
Profile Settings
The Profile tab allows you to manage your personal information and account preferences.
Profile Information
Configure your professional profile details:
Profile Picture
- Click on your avatar to upload a new profile picture
- Supported formats: JPG, PNG, GIF (max 5MB)
- Images are automatically compressed and optimized
- A thumbnail version is created for faster loading in lists
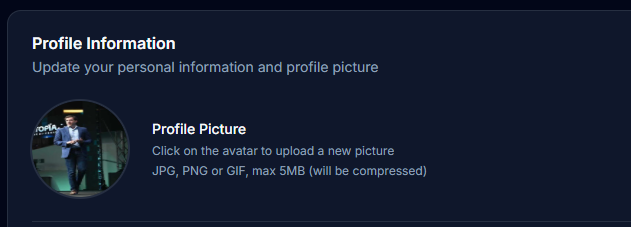 Upload your profile picture to personalize your account with a custom avatar
Personal Details
Update your professional information:
- Full Name - Your display name across the platform
- Email Address - Primary contact email (read-only, loaded from authentication)
- Job Title - Your current position (e.g., "Senior Analyst")
- Department - Your organizational department (e.g., "Engineering, Analytics")
- Bio - Brief professional description (multi-line text area)
Click Save Profile to update your information.
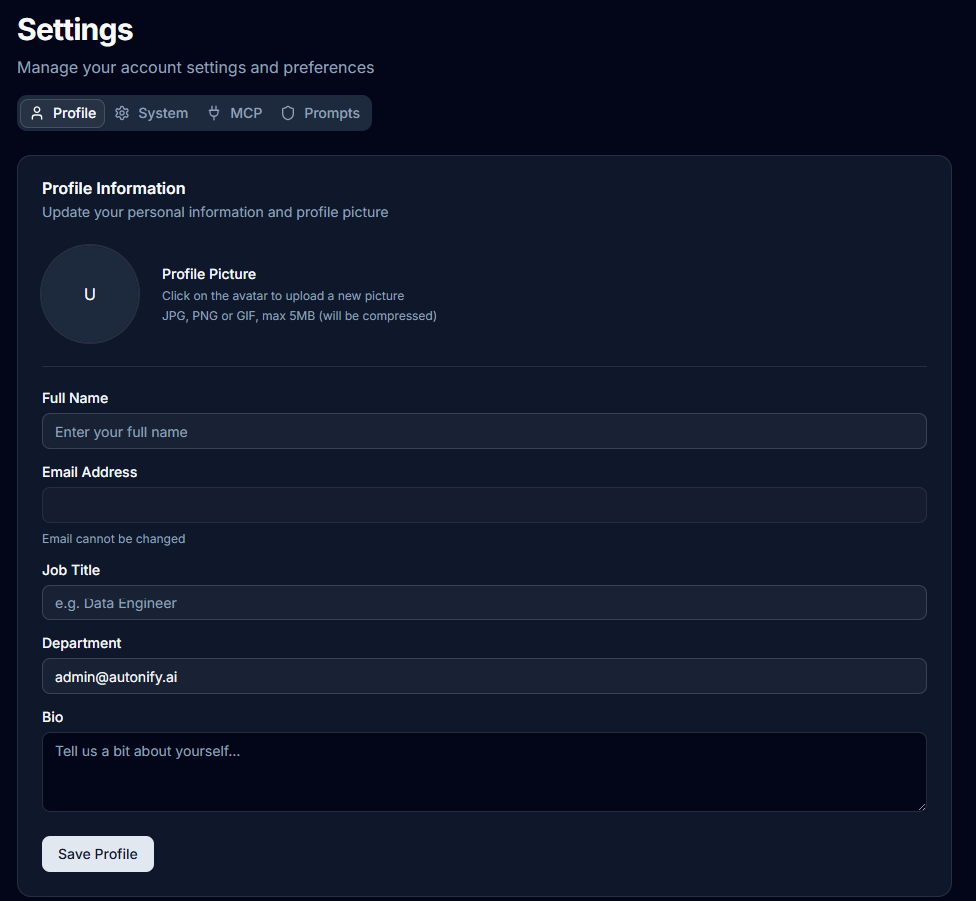 Update your personal information including name, email, and other profile details
Notification Preferences
Control how you receive updates from Autonify:
Available Notification Settings
- Email Notifications - Master toggle for all email communications
- Data Quality Alerts - Notifications when data quality issues are detected
- Agent Completion Alerts - Updates when AI agents complete their tasks
- Weekly Reports - Scheduled summary reports of platform activity
Each notification type can be individually enabled or disabled based on your preferences. Note that individual notifications are only active when the master Email Notifications toggle is enabled.
Click Save Preferences to update your notification settings.
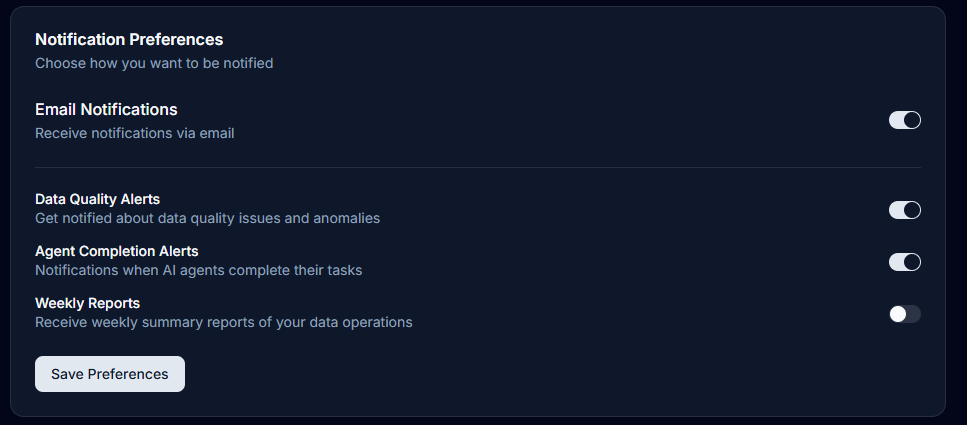 Configure your notification settings with granular control over each notification type
Security Settings
Manage your account security and authentication:
Password Management
For users with native authentication (not using SSO):
Note: For security reasons, the system doesn't verify your current password. Make sure you remember your new password.
- Enter your current password (required for audit purposes)
- Create a new password following requirements:
- Minimum 8 characters
- At least one lowercase letter
- At least one uppercase letter
- At least one number
- Confirm the new password
- Click Update Password to save changes
SSO Users: If you're signed in with Google or Microsoft (Azure), password management is handled by your identity provider. You'll see a message indicating this instead of password fields.
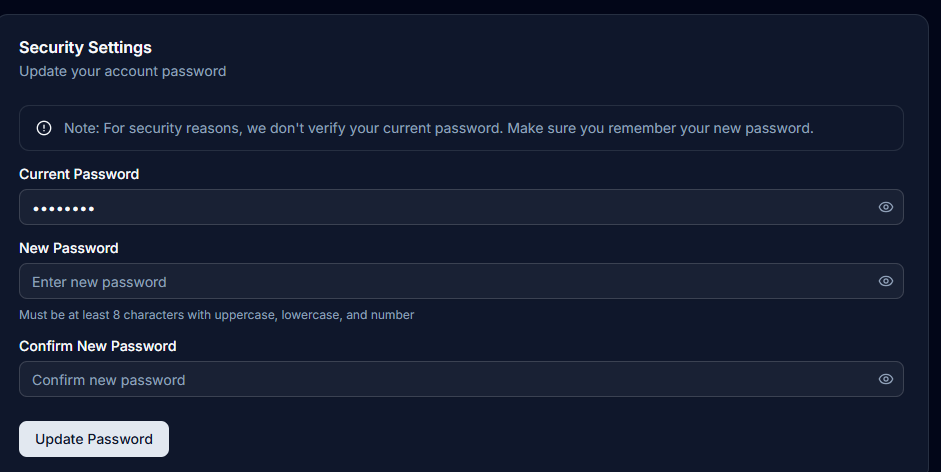 Change your password securely with password strength requirements and visibility toggles
Authentication Provider
The security section displays your current authentication method:
- Email - Native Autonify authentication
- Google - Google SSO authentication
- Microsoft - Microsoft SSO authentication
System Settings (Admin/Owner Only)
The System tab provides configuration for AI model behavior across the platform.
AI Model Configuration
Configure the AI model settings used by all Autonify agents:
Configuration Fields
- Model Type - Select the AI provider (Anthropic, OpenAI, etc.)
- Model Name - Specific model version to use
- Temperature - Controls randomness in responses (0.0 - 1.0)
- API Key - Authentication key for the selected provider
- API URL - Custom endpoint URL (optional)
- API Version - API version string (if required)
- Additional Parameters - Extra configuration in JSON format
Available Actions
- Test Connection - Verify the model configuration works
- Save Configuration - Apply the current settings
- Reset to Defaults - Restore default model settings
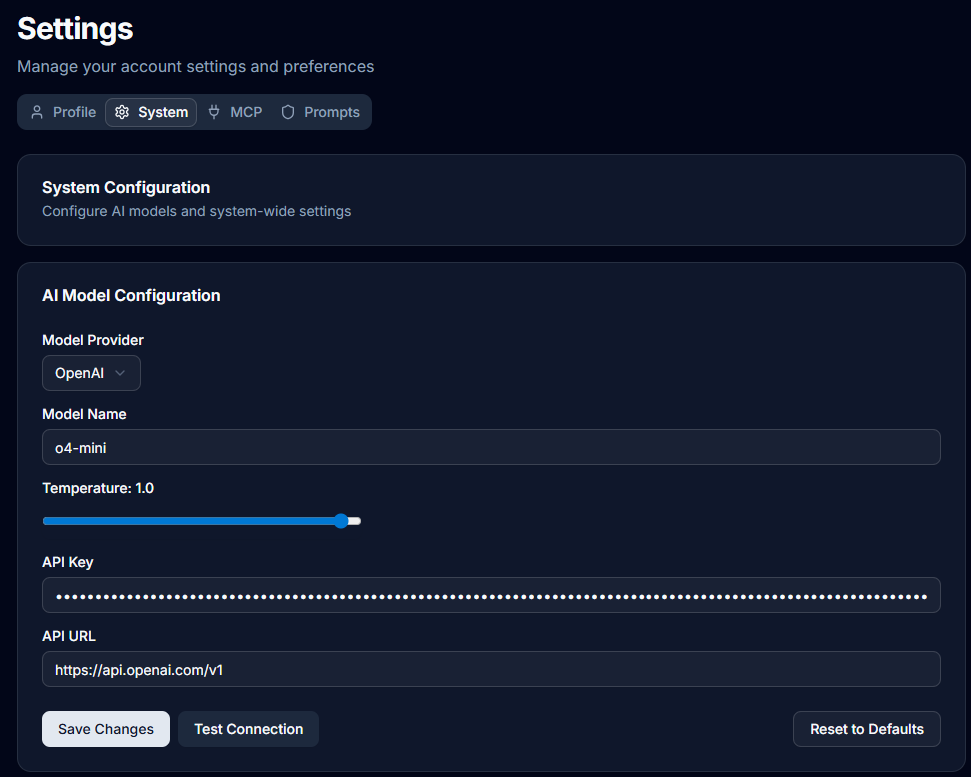 Configure AI models for each agent type with provider selection and testing capabilities
MCP Settings (Admin/Owner Only)
Model Context Protocol (MCP) enables external AI assistants to interact with your Autonify data.
MCP Integrations
Manage MCP server configurations for external tools:
MCP Services Table
The MCP integrations are displayed in a table format with:
- Service - Display name and description of the MCP service
- Endpoint URL - Full URL for connecting to the service (with copy button)
- Status - Shows "Enabled" or "Disabled" (with usage count if applicable)
- Actions - Toggle switch to enable/disable the service
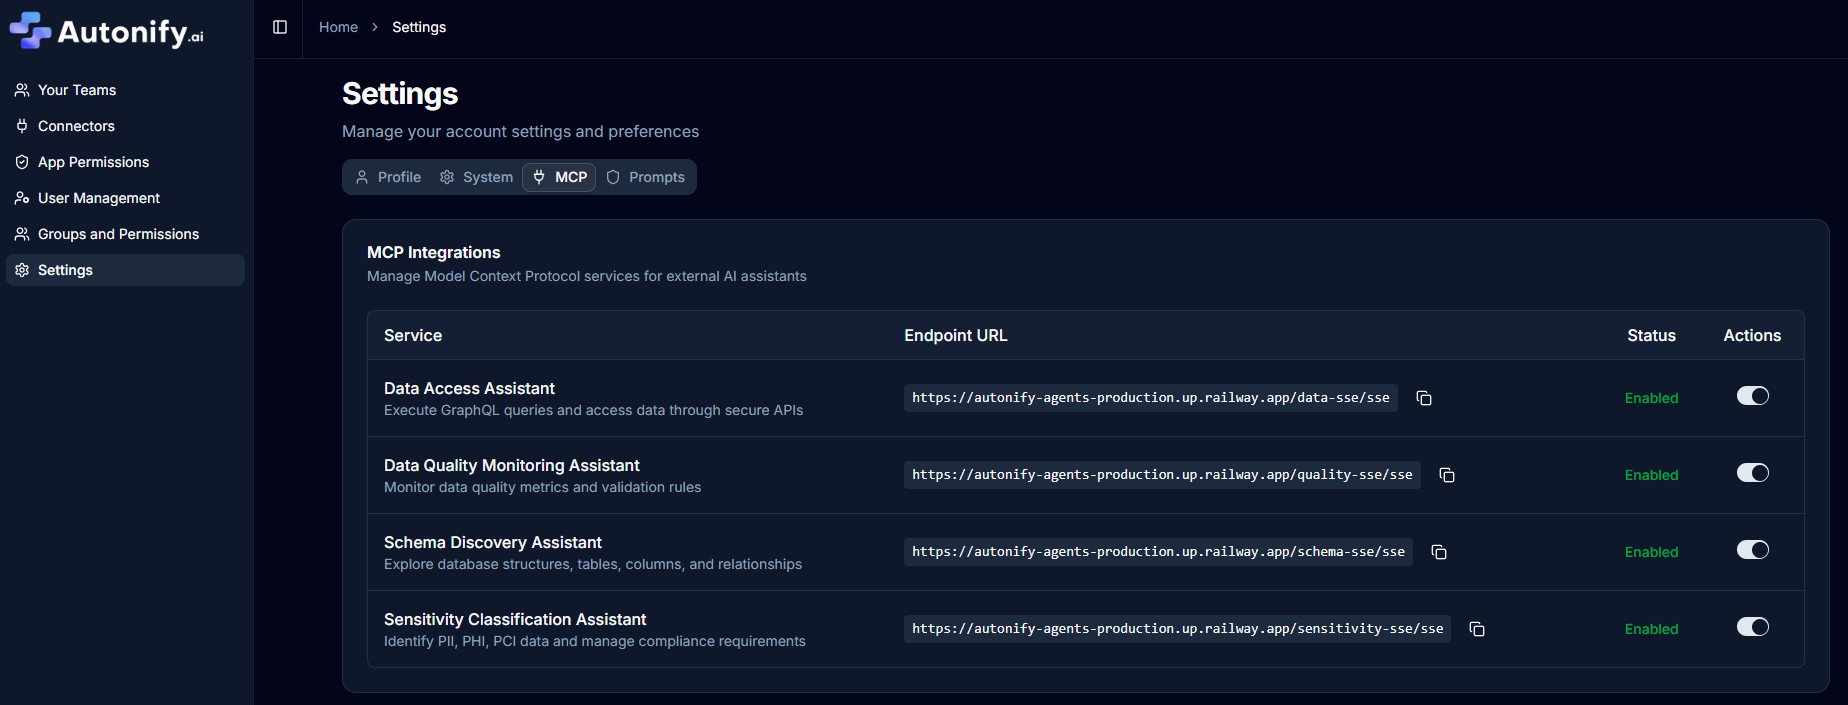 View and manage MCP services with endpoint URLs, status indicators, and toggle controls
Managing MCP Services
-
Enable/Disable Services
- Toggle the switch next to each service
- Changes take effect immediately
- Disabled services reject incoming connections
-
Copy Service URLs
- Click the copy icon next to any URL
- Share with authorized external tools
- URLs remain constant even when services are toggled
-
Service Status
- Enabled (green text) - Service is active
- Disabled (gray text) - Service is inactive
- Usage count displayed below status when applicable
Prompts Settings (Admin/Owner Only)
The Prompts tab allows customization of AI agent prompts used throughout the platform.
Prompt Management
View and edit prompts that control agent behavior:
Prompts Table Display
Prompts are shown in a table with columns:
- Agent - Agent name and prompt key
- Prompt Name - Display name and description
- Category - Category badge (colored by type)
- Variables - Variable badges showing used placeholders
- Updated - Last modification date
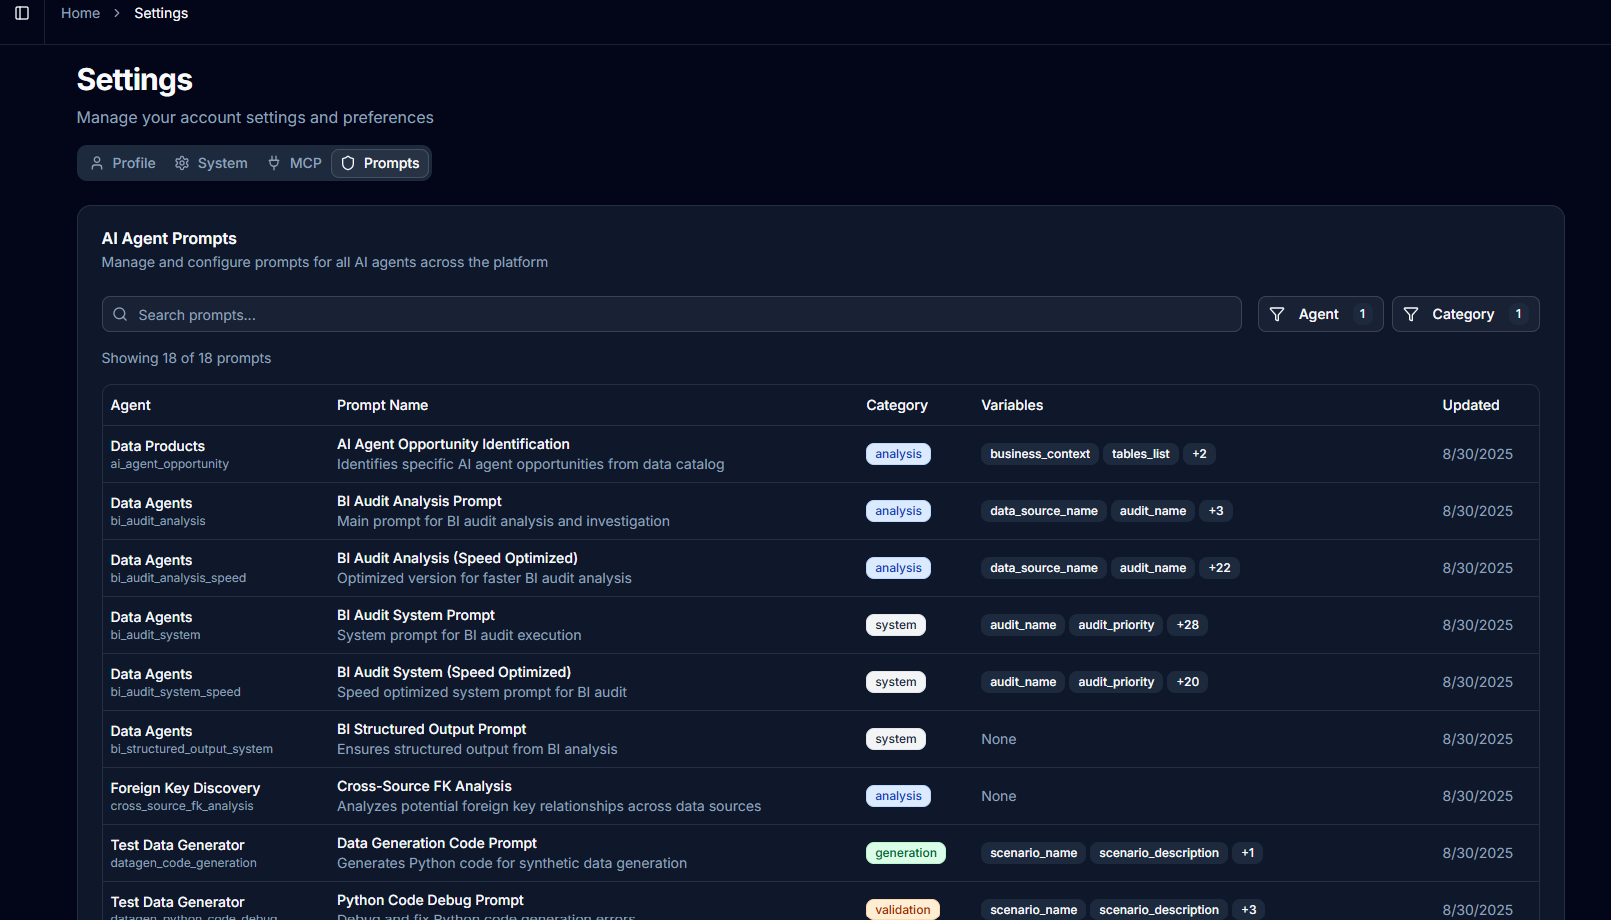 Browse and filter AI prompts by agent type with search functionality
Filtering and Search
Find specific prompts using:
- Agent Filter - Show prompts for specific agents only
- Category Filter - Filter by prompt category
- Search Bar - Search by name, key, or description
Editing Prompts
To modify a prompt:
- Click on any row in the prompts table
- The prompt editor opens in a new tab at
/settings/prompts/{prompt_key} - Edit the prompt content and variables
- Save changes to update all agents using this prompt
Note: Click on any row to edit the prompt (opens in new tab)
Prompt Variables
Variables are displayed as badges in the table. Each prompt can have multiple variables that are replaced during agent execution. Common variables include database context, table names, and dynamic content specific to each agent type.
Display: Up to 2 variable badges are shown, with a "+N" indicator for additional variables
Best Practices
Profile Management
- Keep your profile information current for better team collaboration
- Upload a professional profile picture for easy identification
- Configure notification preferences to avoid alert fatigue
Security
- Use strong, unique passwords for native authentication
- Regularly update your password (every 90 days recommended)
- Enable SSO if available in your organization
System Configuration
- Test model changes in a development environment first
- Document any custom prompt modifications
- Monitor costs when using premium AI models
MCP Integration
- Only enable MCP services you actively use
- Regularly audit which external tools have access
- Rotate service URLs if security is compromised
Troubleshooting
Common Issues
Profile Picture Not Uploading
- Ensure image is under 5MB
- Try a different image format (JPG usually works best)
- Clear browser cache and retry
Password Change Fails
- Verify current password is correct
- Ensure new password meets all requirements
- Check if your account uses SSO (cannot change password)
MCP Service Not Connecting
- Verify service is enabled
- Check firewall settings allow outbound connections
- Ensure external tool has correct URL
Prompts Not Updating
- Clear browser cache after saving
- Verify you have Admin/Owner permissions
- Check for syntax errors in prompt text