Agent Execution
Learn how to run, monitor, and manage AI agents in Autonify. This guide covers manual execution, automatic triggers, scheduling, and configuration options for optimal agent performance.
📹 Agent Configuration & Execution Tutorial
Master AI agent execution in Autonify with this detailed tutorial covering agent parameters, execution controls, and scheduling options.
Overview
Autonify agents can be executed in multiple ways:
- Automatic Execution: Triggered after data source scans when changes are detected
- Manual Execution: On-demand running via the Run Agent button
- Scheduled Execution: Automated runs based on cron schedules
- Programmatic Execution: Via API calls (for advanced integrations)
Viewing Active Agents
Dashboard View
The dashboard shows agent activity for your data source:
- Navigate to your data source
- Check the Agent Activity section
- View which agents are active and operational
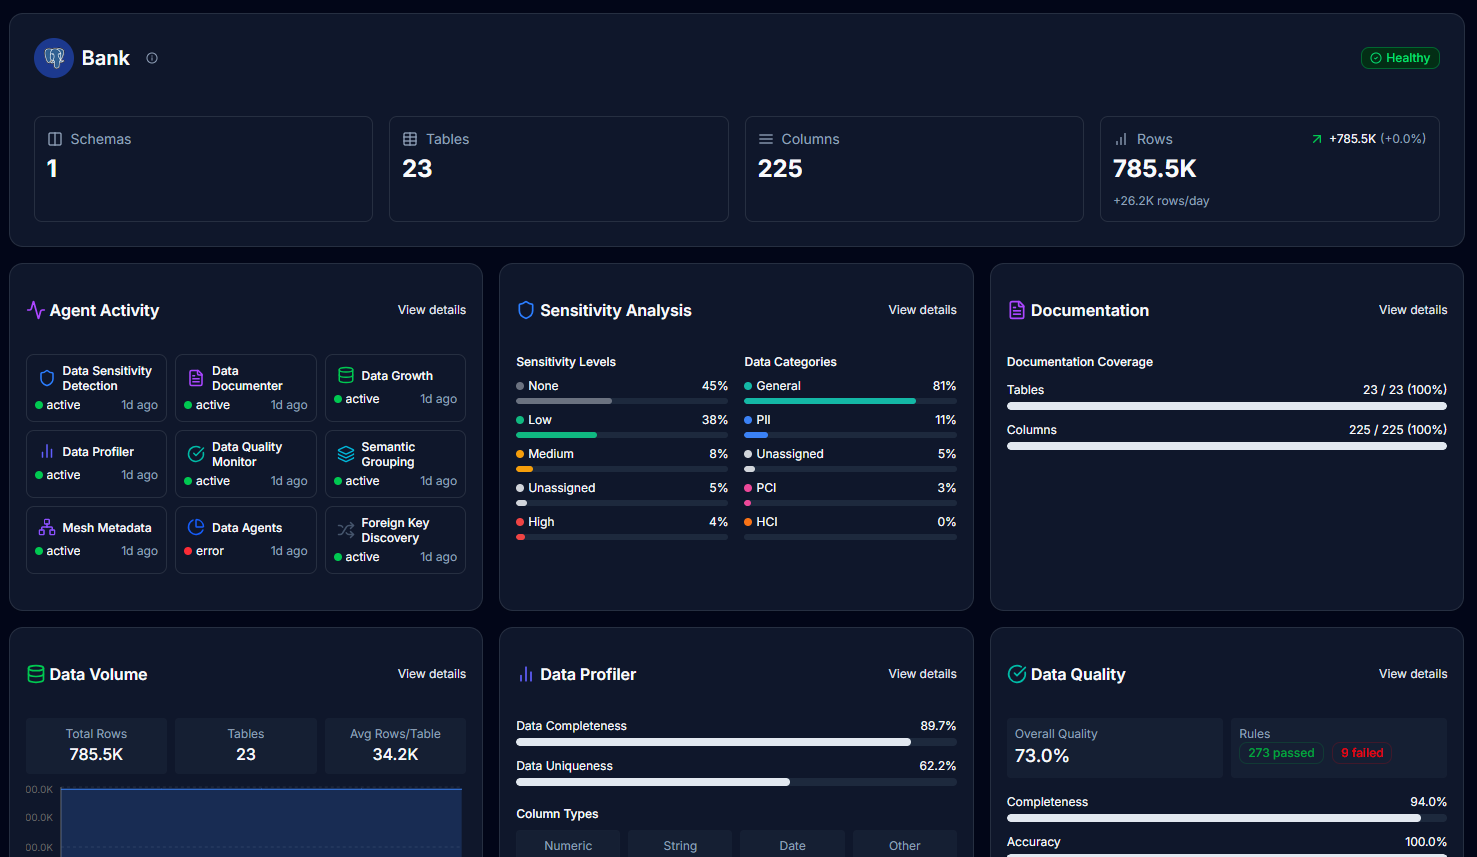
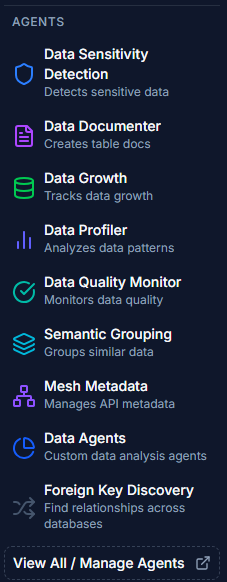
Sidebar Agent List
The left sidebar displays all agents attached to your data source:
- Each agent shows its name and description
- Click on any agent to view details
- Icons indicate agent type and status
Manual Agent Execution
Running an Agent
To manually execute an agent:
- Open the agent from the sidebar or agent list
- Click the Run Agent button
- The agent begins execution immediately
- Status updates to "Running..."
Execution Feedback
After starting an agent:
- Progress indicator shows the agent is running
- Real-time status updates appear
- Completion message confirms successful execution
- Results are displayed once processing finishes
Canceling Execution
While an agent is running:
- The Run Agent button changes to a red Cancel button
- Button shows Cancelling... while processing cancellation
- Click Cancel to stop the execution
- The agent will terminate gracefully
- Partial results may be saved depending on the agent type
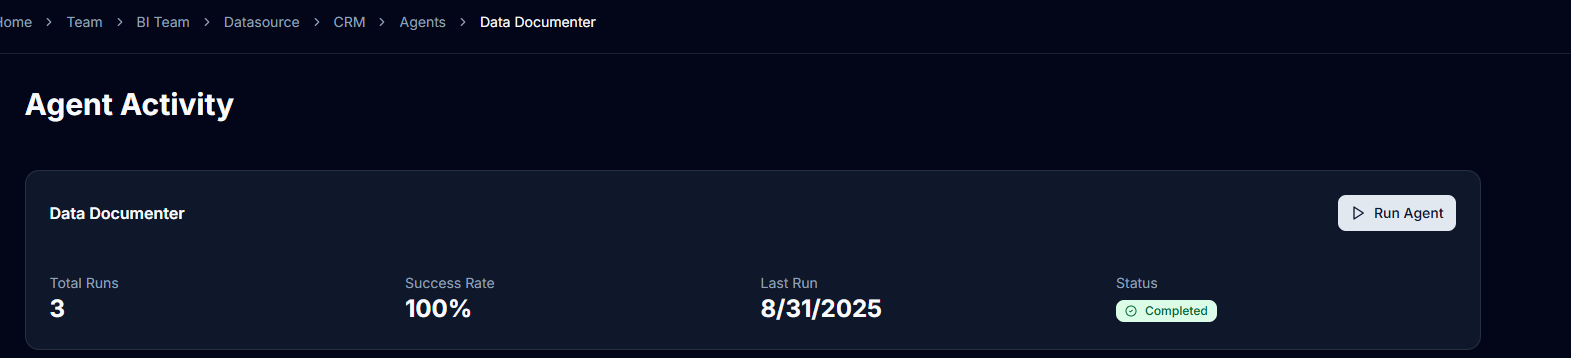
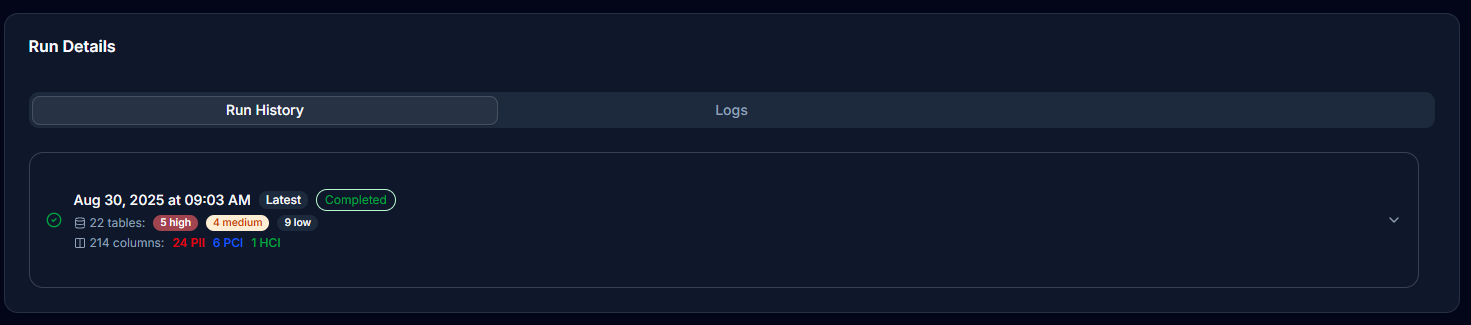
Viewing Execution History
Run History
Scroll down on any agent page to see:
- Complete execution history
- Timestamps for each run
- Status indicators (Completed, Failed, Cancelled)
- Duration of each execution
Execution Logs
Each run includes detailed logs:
- Processing steps performed
- Tables or data analyzed
- Any errors or warnings encountered
- Performance metrics
Managing Agents
Accessing Agent Management
- Click View All / Manage Agents at the bottom of the agent sidebar
- This opens the agent management interface
Note: Only Admin and Owner roles can see this option.
Agent Management Interface
The management page has two tabs:
Connected Agents Tab
- Lists all agents currently attached to the data source
- Each agent card shows:
- Agent name and description
- Category badge
- View button to open agent details
- Remove button to disconnect the agent
- Removing an agent shows a confirmation dialog
Available Agents Tab
- Shows agents not yet connected to your data source
- Each agent card displays:
- Agent name and description
- Category badge
- Connect button to add the agent
- Connected agents become immediately operational
Agent Settings
Accessing Agent Settings
- Navigate to your data source
- Click on Agent Settings in the navigation
- Configure processing limits and exclusions
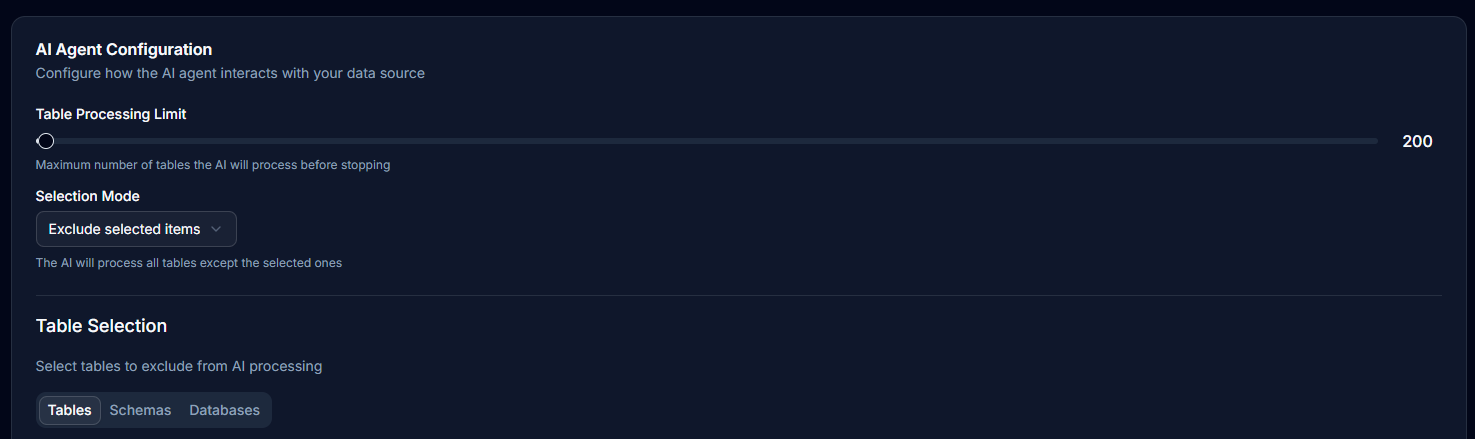
Processing Limits
Control AI costs and processing time:
Table Processing Limit:
- Slider to set maximum tables processed
- Range: 1 to 100,000 tables
- Shows current value next to slider
- Description: "Maximum number of tables the AI will process before stopping"
- Helps manage AI token consumption

Exclusion Configuration
Specify what to exclude from AI processing:
Selection Mode
- Include selected items only: Process only the selected tables
- Exclude selected items: Process all tables except the selected ones
Table Selection Tabs
Three tabs for different selection levels:
- Tables: Select specific tables individually
- Schemas: Select entire schemas to include/exclude
- Databases: Select complete databases to include/exclude
This configuration:
- Improves processing speed
- Reduces AI costs
- Focuses agents on relevant data
- Protects sensitive information
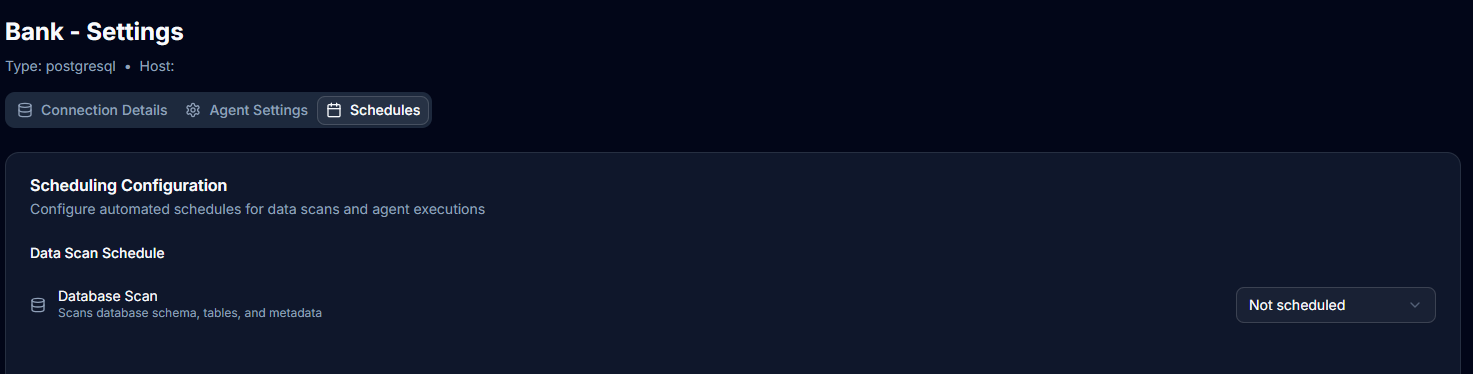
Agent Scheduling
Setting Up Schedules
Configure automated agent execution:
- Navigate to your data source
- Open the scheduling interface for agents
- Click to create or edit a schedule for an agent
- The Schedule dialog opens
Schedule Options
Schedule Type Selection
- Use Preset: Choose from predefined schedules
- Custom Cron Expression: Enter custom cron syntax
Preset Schedules
- Every hour (at the start of every hour)
- Every 6 hours
- Every 15 minutes
- Every 30 minutes
- Daily at 2 AM
- Daily at midnight
- Weekly on Monday (at 2:00 AM)
- Weekly on Sunday (at 2:00 AM)
- Monthly on 1st (at 2:00 AM)
Custom Cron Expressions
- Create precise schedules using cron syntax
- Example:
0 2 * * *(daily at 2 AM) - Supports complex patterns
Schedule Configuration Dialog
- Schedule Type: Dropdown to select preset or custom
- Schedule Frequency: Dropdown with preset options (when using preset)
- Cron Expression: Text input for custom cron (when using custom)
- Description: Optional text area for schedule notes
- Enabled: Switch to enable/disable the schedule
- Save button to confirm changes
Automatic Execution
Trigger Conditions
Agents run automatically when:
- A data source scan completes
- Changes are detected in the schema
- New tables or columns are discovered
- Data quality thresholds are crossed
Automatic Execution Behavior
- Agents run in a specific order based on dependencies
- Failed agents don't block other agents
- Notifications sent on completion or failure
- Results available in agent history
Best Practices
Execution Frequency
- Balance between data freshness and cost
- Use scheduling for predictable workloads
- Manual execution for ad-hoc analysis
- Monitor execution history for optimization
Cost Management
- Set appropriate table processing limits
- Exclude non-critical schemas/tables
- Review agent logs to identify inefficiencies
- Use scheduling during off-peak hours
Performance Optimization
- Exclude system tables and logs
- Focus agents on business-critical data
- Run heavy processing agents during low-usage periods
- Monitor execution times and adjust limits
Troubleshooting
Agent Won't Start
- Check if another execution is in progress
- Verify agent is connected to data source
- Ensure you have permission to run agents
- Review any error messages in logs
Slow Execution
- Review table processing limits
- Check exclusion settings
- Consider scheduling during off-peak times
- Examine logs for bottlenecks
Failed Executions
- Check execution logs for error details
- Verify data source connectivity
- Ensure sufficient permissions
- Review agent-specific requirements
Next Steps
After understanding agent execution: