Agent Configuration
Learn how to configure and manage AI agents within your data sources, including settings for execution limits, table exclusions, and scheduling automated runs.
📹 Agent Configuration
Learn how to configure and manage AI agents within your data sources.
Overview
Autonify provides comprehensive configuration options for AI agents, allowing you to control how they interact with your data sources. This includes managing costs, setting execution schedules, and defining which data elements should be processed.
Accessing Agent Configuration
Agent configuration is accessed through multiple entry points:
From the Sidebar
- Navigate to your data source in the Autonify platform
- Agents are listed in the left sidebar under the "Agents" section
- Click on any agent name to view its details and run history
- Admin/Owner users will see a "View All / Manage Agents" link at the bottom of the agents list
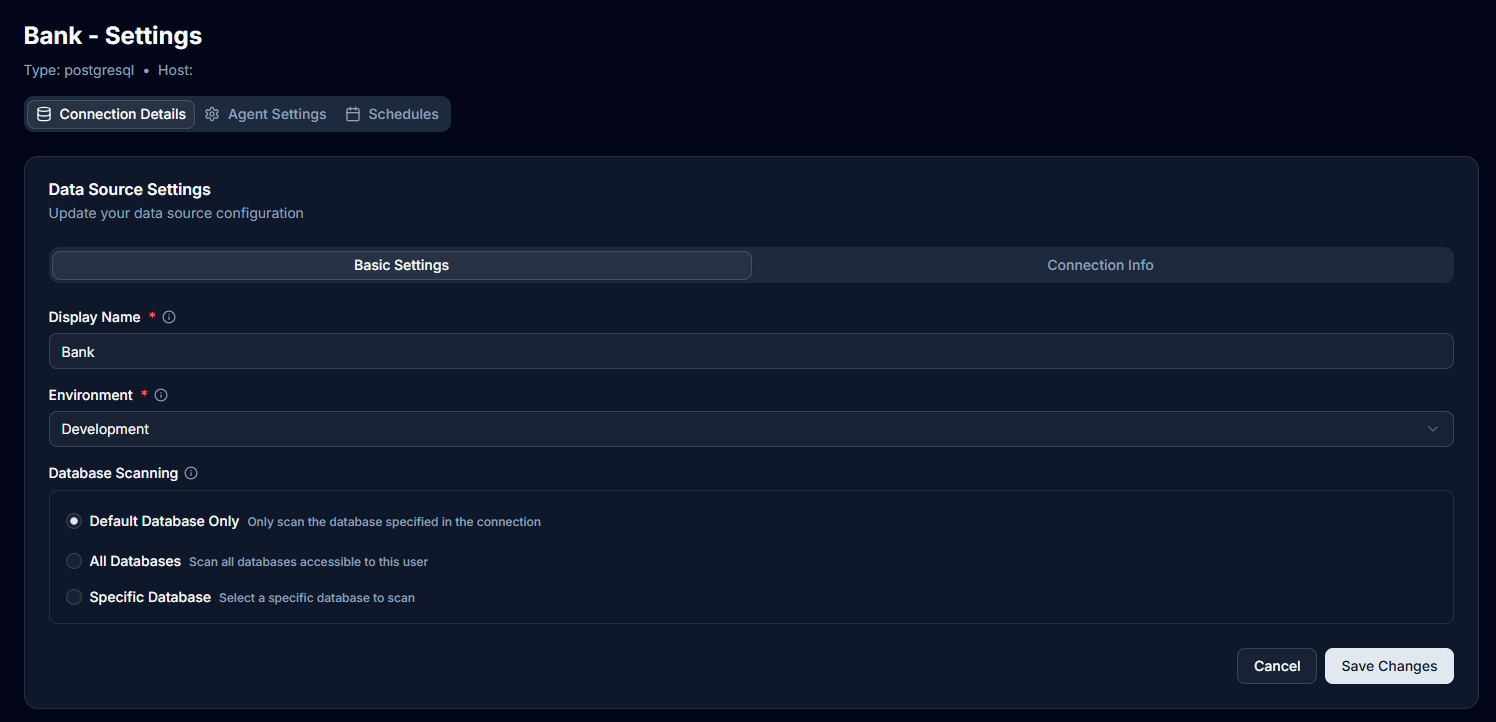
From the Settings Page
- Click "Settings" in the left sidebar (only visible to Admin/Owner users)
- You'll see three tabs:
- Connection Details - Database connection settings
- Agent Settings - AI processing limits and exclusions
- Schedules - Automated execution schedules
Running Agents
Manual Execution
Agents can be run manually at any time:
- Open the desired agent from the data source sidebar
- Click the "Run Agent" button (shows play icon)
- The agent will execute against your data source
- While running, a "Cancel" button appears to stop execution if needed
- View the results once processing completes
After execution, you can:
- Review the run history showing all past executions
- View the status of each run (Completed, Failed, In Progress, Queued)
- Check execution logs for detailed information
- See statistics including total runs, success rate, and last run date

Automatic Execution
By default, all agents run automatically when:
- A new scan is performed on the data source
- Changes are detected in the data structure
Managing Connected Agents
View Connected and Available Agents
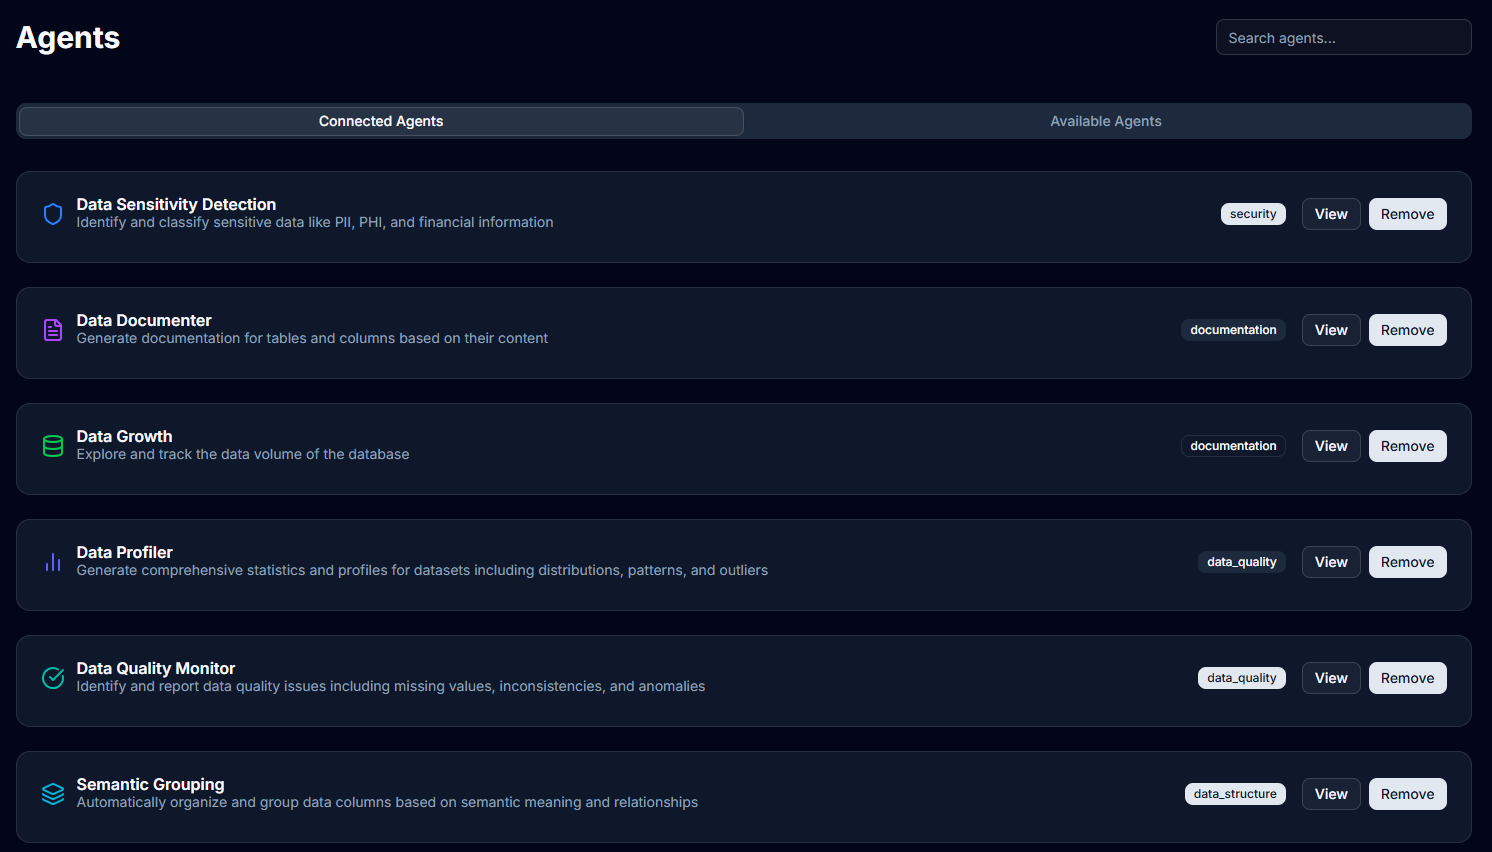
Navigate to the Agents page (click "View All / Manage Agents" in the sidebar or go to /agents from your data source) to see two tabs:
- Connected Agents - Agents currently linked to your data source
- Available Agents - Agents that can be connected
Note: The "View All / Manage Agents" link is only visible to Admin and Owner users.
Managing Connected Agents
For each connected agent, you can:
- Click "View" to see the agent's details and run history
- Click "Remove" to disconnect the agent from the data source
- A confirmation dialog will appear before removing an agent
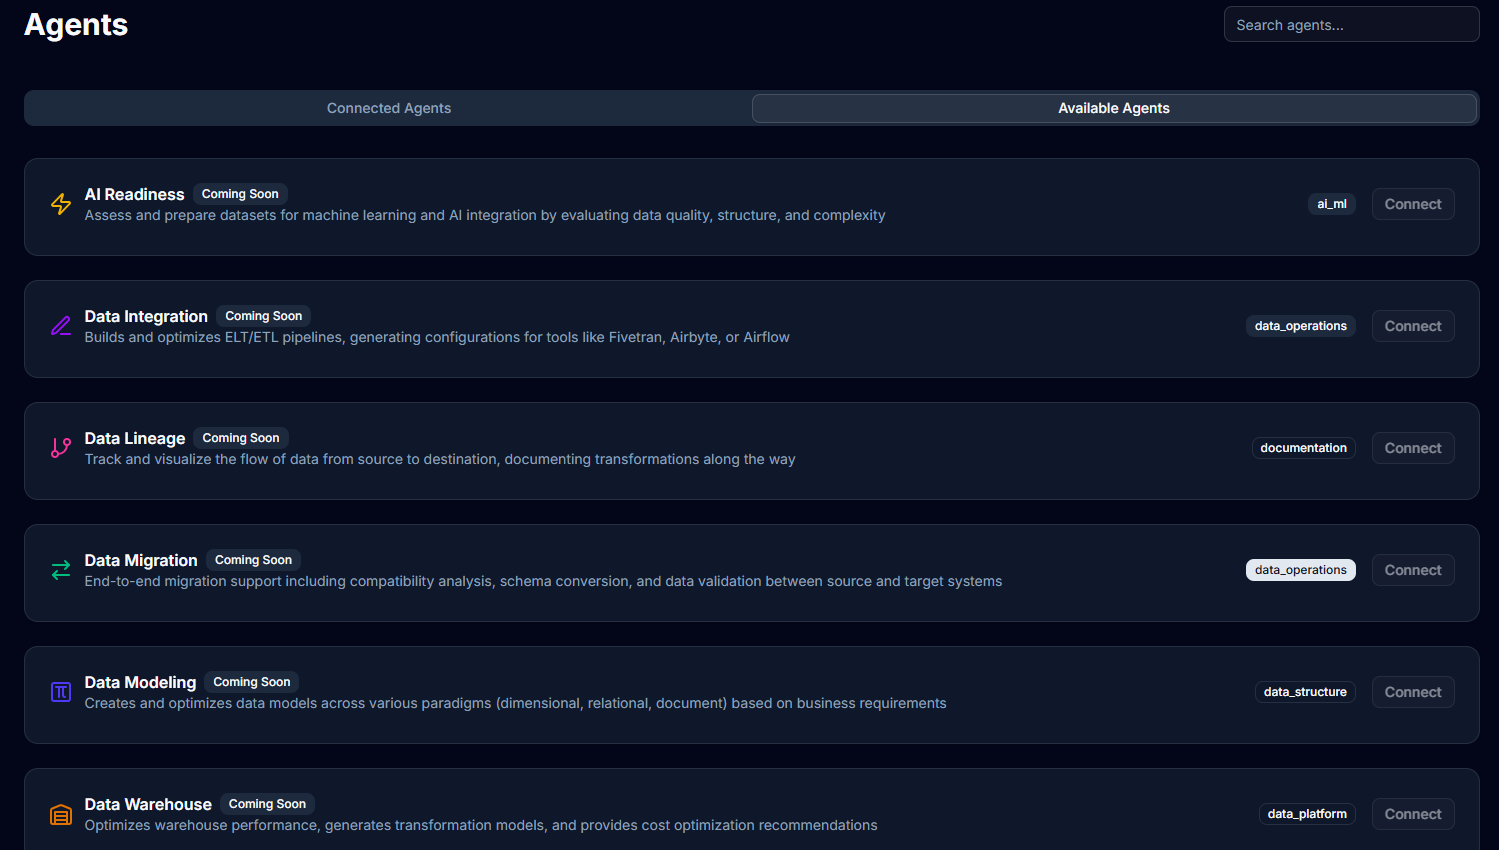
Connecting Available Agents
To add new agents to your data source:
- Switch to the "Available Agents" tab
- Browse agents not yet connected to your data source
- Click the "Connect" button for any agent
- The agent immediately moves to the Connected Agents tab
- You'll see a success notification confirming the connection
Agent Settings Configuration
AI Processing Limits
Control AI costs and processing scope through the Agent Settings tab:
Table Processing Threshold
Set the maximum number of tables an agent will process:
- Navigate to "Settings" in your data source sidebar
- Click the "Agent Settings" tab
- Find the "Table Processing Limit" slider under "AI Agent Configuration"
- Adjust the value from 1 to 100,000 tables
- The description shows: "Maximum number of tables the AI will process before stopping"
- Click "Save Changes" button at the bottom
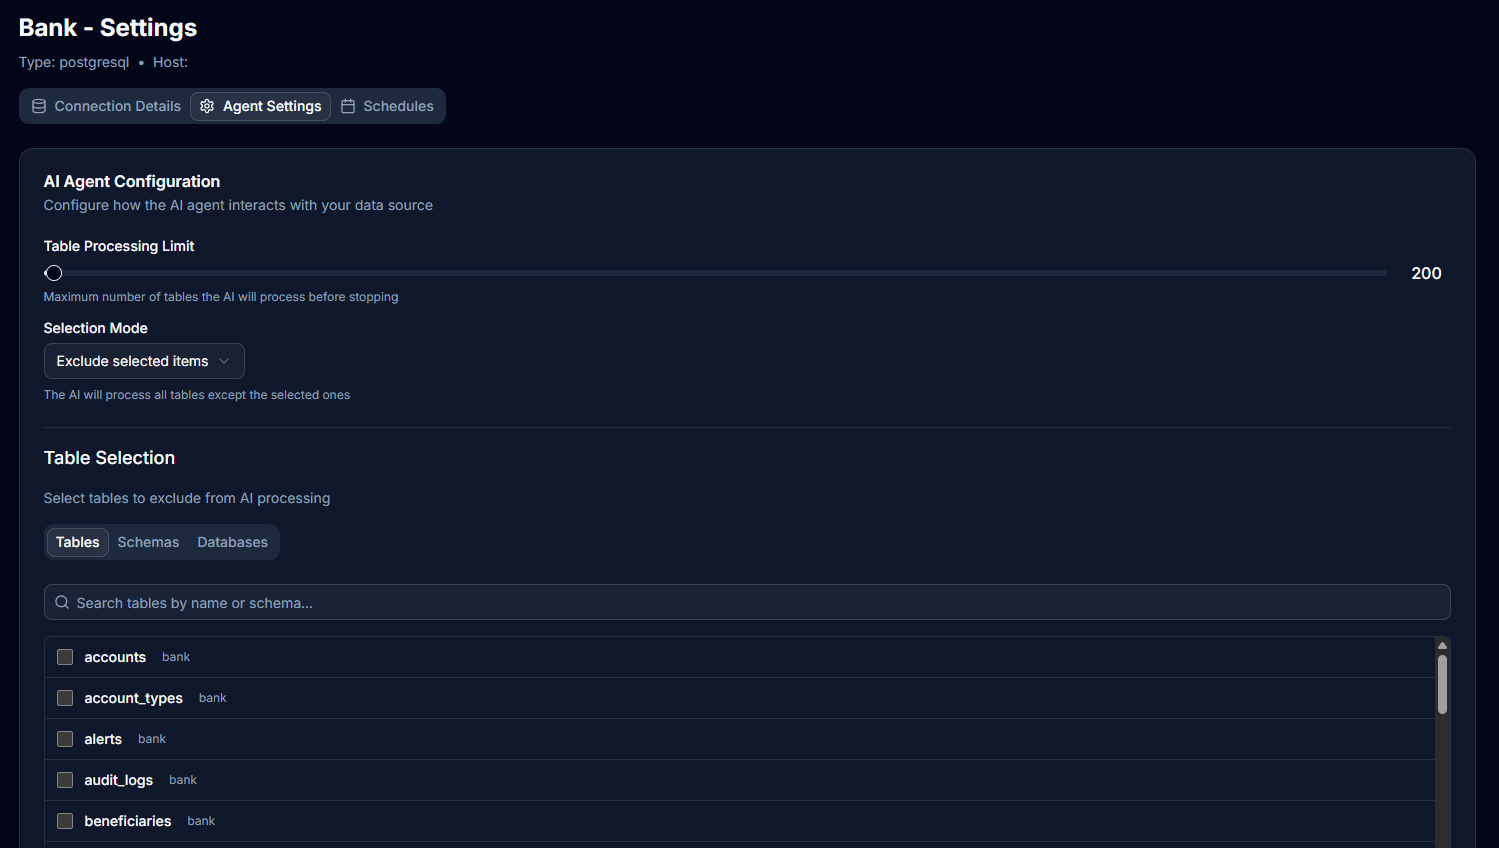
Selection Mode
Choose how to control which data the AI processes:
- In Agent Settings, select the "Selection Mode" dropdown
- Choose between:
- Include selected items only - AI processes only selected tables/schemas/databases
- Exclude selected items - AI processes everything except selected items
- The description updates to explain the current mode
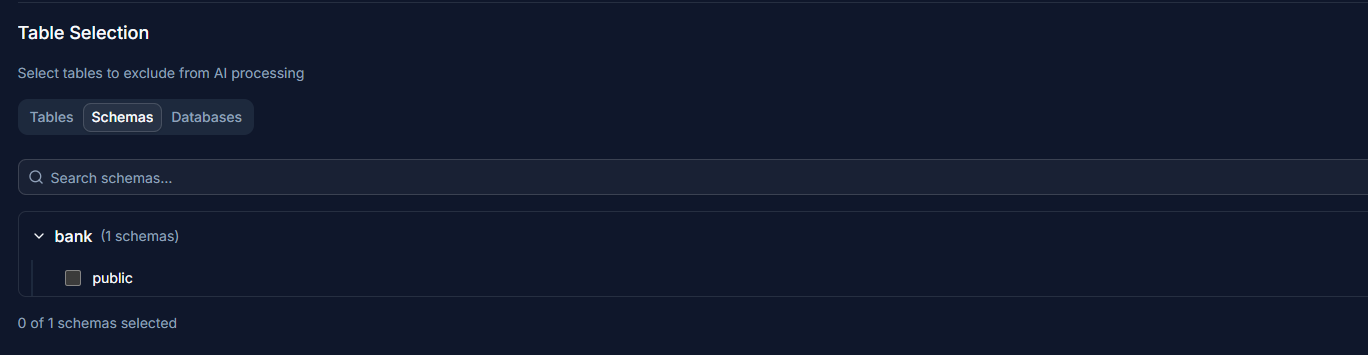
Table and Schema Selection
Control specific database elements for AI processing:
- Use the three tabs to select different levels:
- Tables tab - Select individual tables
- Schemas tab - Select entire schemas
- Databases tab - Select complete databases
- Your selection mode determines if these are included or excluded
- Click "Save Changes" to apply your selections
Benefits of selection controls:
- Improved processing speed
- Reduced AI costs
- Focus on relevant data only
- Skip sensitive or temporary tables
Agent Scheduling
Configure automated execution schedules for your agents.
Accessing Scheduling
- Navigate to "Settings" in your data source sidebar
- Click the "Schedules" tab
- You'll see two sections:
- Data Scan Schedule - For database scanning
- Agent Schedules - For individual agent execution
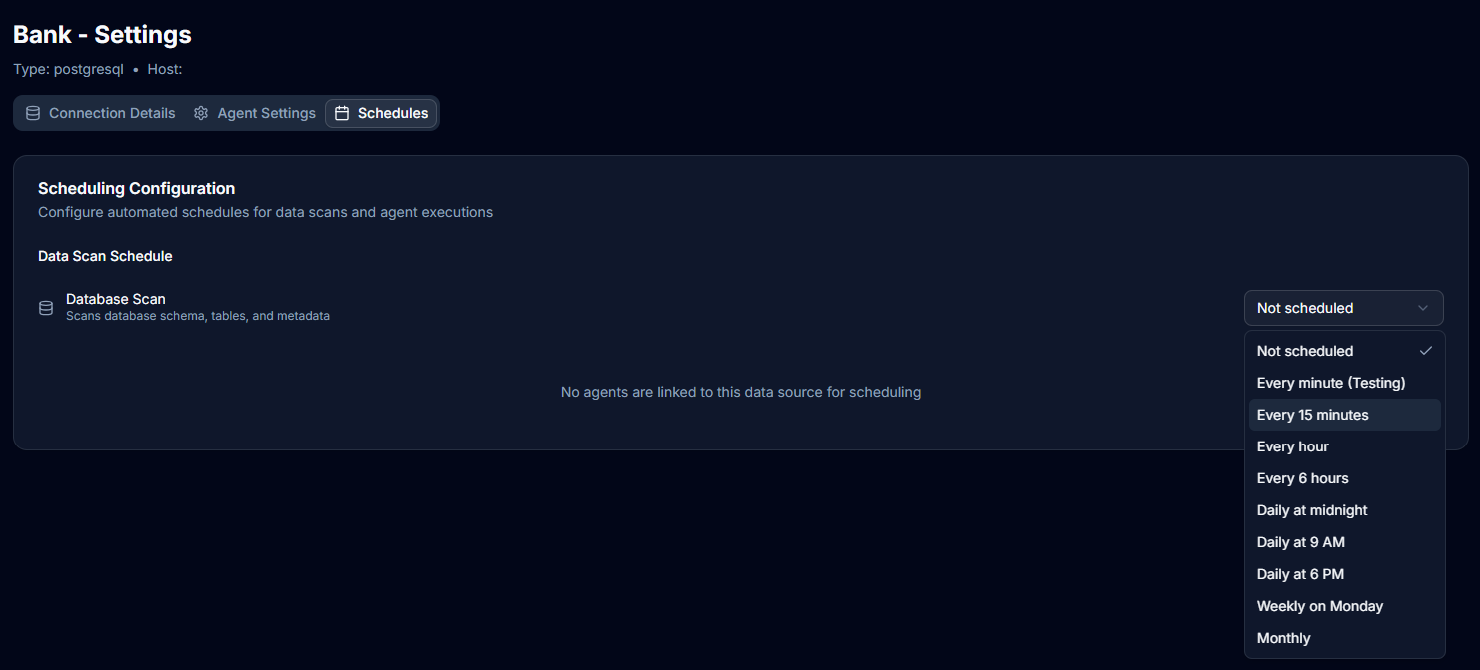
Configuring Schedules
For each agent or scan, use the dropdown menu to select a schedule:
- Choose from preset options (Every hour, Daily, Weekly, etc.)
- Select "Not scheduled" to disable scheduling
- Custom cron expressions are not available in the dropdown interface
Available Schedule Presets
The dropdown menu provides these preset options:
- Not scheduled - No automatic execution
- Every minute (Testing) - For testing purposes only
- Every 15 minutes - Frequent monitoring
- Every hour - Runs at the start of every hour
- Every 6 hours - Runs four times daily
- Daily at midnight - Runs at 12:00 AM
- Daily at 9 AM - Business hours execution
- Daily at 6 PM - End of day execution
- Weekly on Monday - Runs Monday at midnight
- Monthly - Runs on the 1st at midnight
[Note: Custom cron expressions are selected from presets in the dropdown menu. Advanced cron patterns are not currently supported through the UI.]
Managing Schedules
- Update: Simply select a new option from the dropdown to change the schedule
- Disable: Select "Not scheduled" to stop automatic execution
- View History: Check individual agent pages to see run history from scheduled executions
- Changes are saved automatically when you select a new schedule option
Best Practices
Cost Management
- Set appropriate table limits - Start with lower limits and increase as needed
- Use exclusions wisely - Exclude test tables, logs, and temporary data
- Schedule during off-peak hours - Reduce impact on database performance
Performance Optimization
- Exclude large tables - Skip tables with millions of rows if not needed
- Focus on critical schemas - Process only business-critical data
- Stagger agent schedules - Avoid running all agents simultaneously
Monitoring
- Review run history regularly - Check for failures or issues
- Monitor execution logs - Understand what agents are processing
- Track AI costs - Keep an eye on usage through table limits
Troubleshooting
Common Issues
Agent not running on schedule:
- Verify the schedule is enabled
- Check the cron expression syntax
- Ensure the data source is accessible
Agent processing too many tables:
- Lower the table processing limit
- Add more exclusions
- Consider splitting into multiple focused agents
High AI costs:
- Reduce table processing limits
- Exclude unnecessary tables/schemas
- Adjust scheduling frequency
Next Steps
- Learn about AI agents overview
- Explore agent execution
- Configure data sources
- View data catalog