Creating Connections
Learn how to create and configure connections to your data sources and external systems. Connectors provide the access layer between Autonify and your ecosystem, including databases, applications, CRMs, and ERPs.
📹 Step-by-Step Connection Setup
Follow this tutorial to create connections to your databases and applications, configure connection parameters, and test connectivity.
Understanding Connectors
Connectors are the foundation for integrating Autonify with your data ecosystem:
- Database Connectors: Connect to relational databases and data warehouses
- Application Connectors: Integrate with CRMs, ERPs, and other business applications
- Out-of-the-box Support: Many connectors work immediately without configuration
- Custom Connectors: Some connectors require Autonify support for setup
Creating a New Connection
Step 1: Access Connectors
- Navigate to the Connectors section in the portal
- View existing connectors if any are already configured
- Click the Add Connector button to start
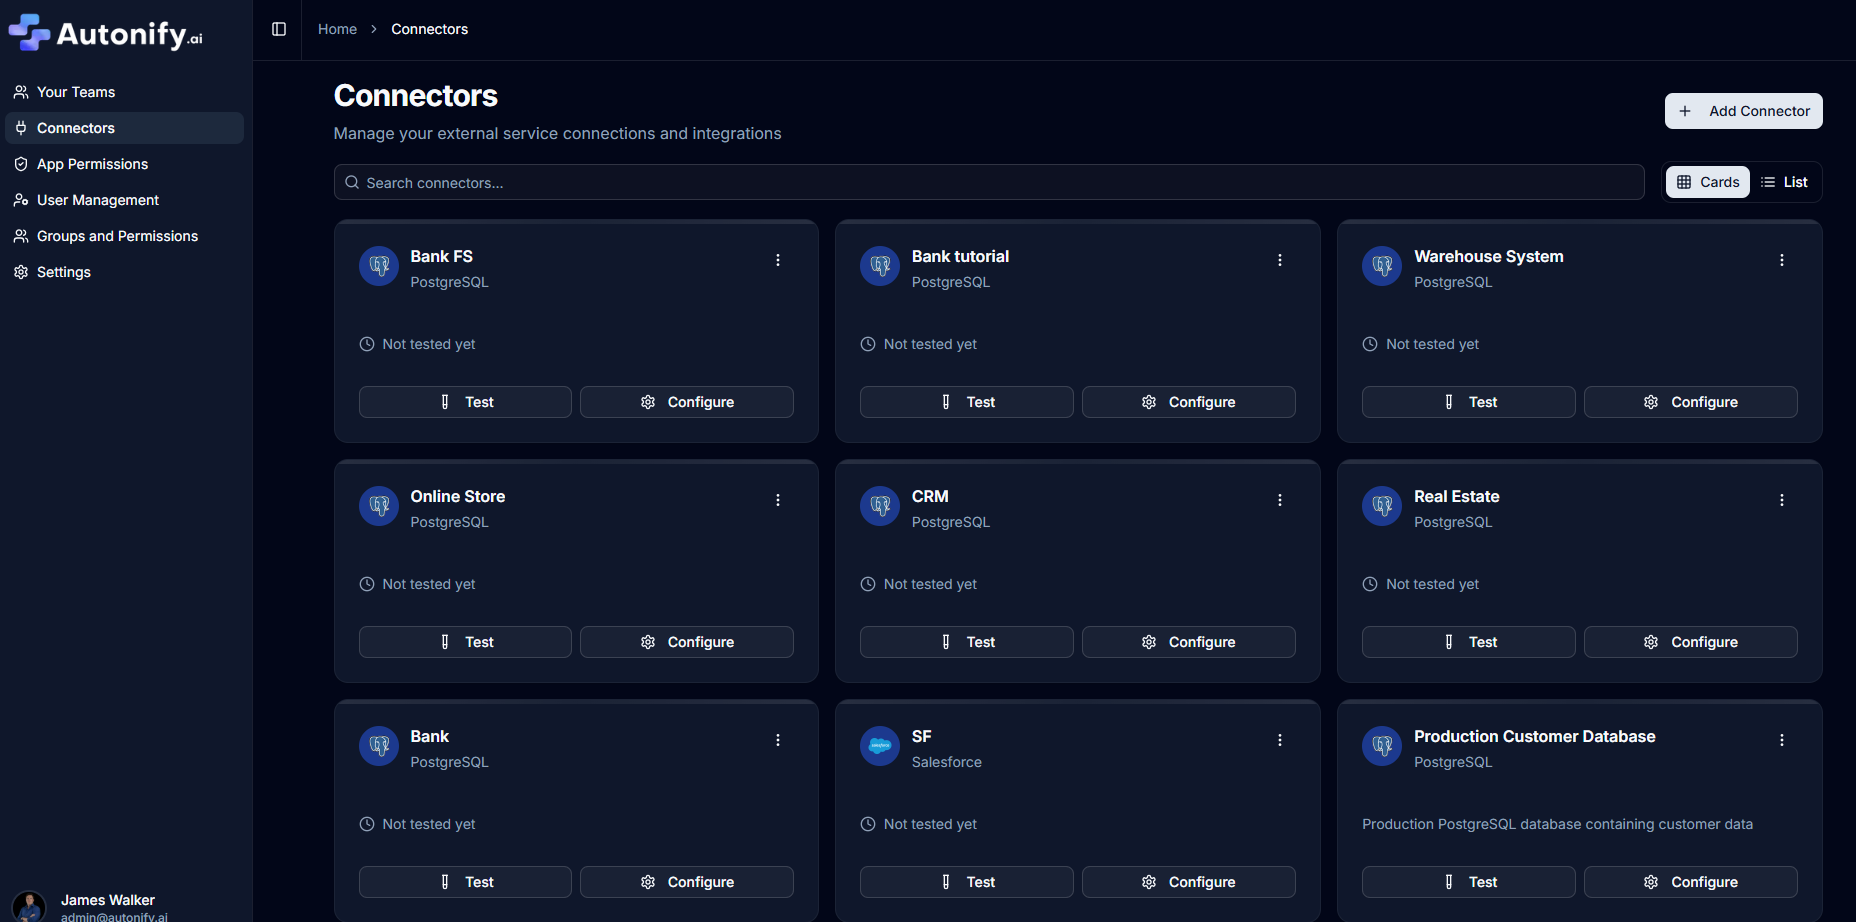
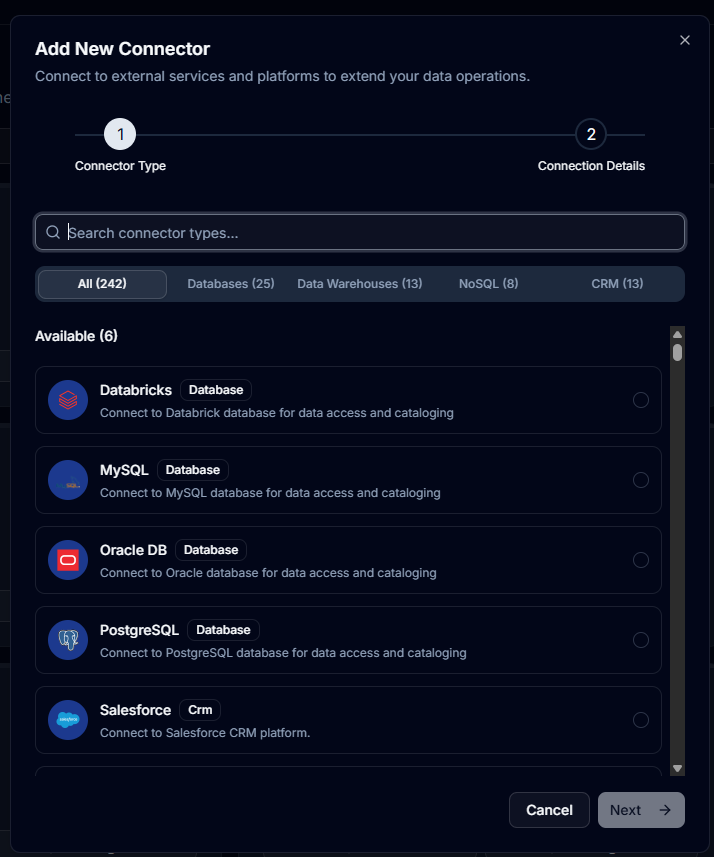
Step 2: Select Connection Type
- Browse available connector types in the dialog
- Use the search bar to filter connectors
- Choose your desired connection type (e.g., PostgreSQL, MySQL, SQL Server)
- Click Next to proceed
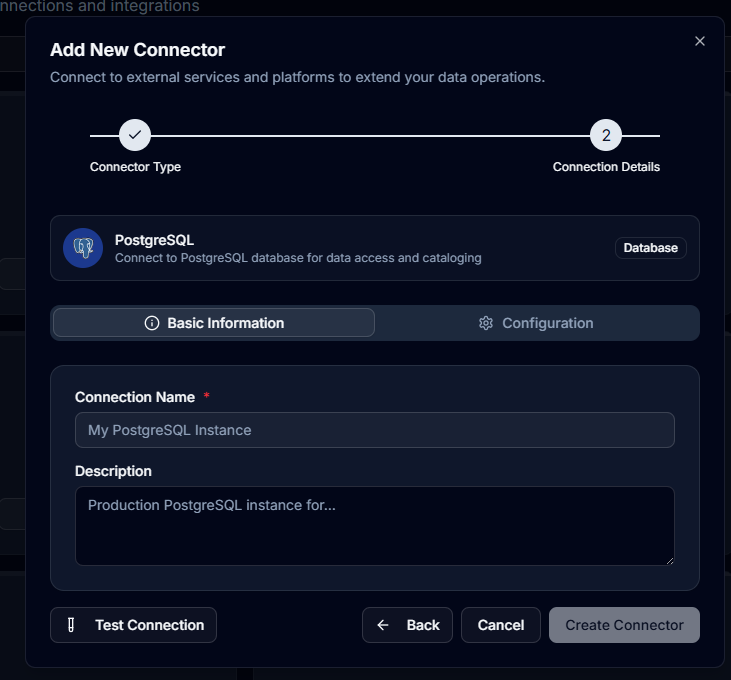
Step 3: Configure Basic Information
Provide the following details:
Connection Name
- Enter a descriptive name for your connection
- Example: "BankFS" for a banking financial services database
Description (Optional)
- Add context about the connection's purpose
- Helps team members understand the data source
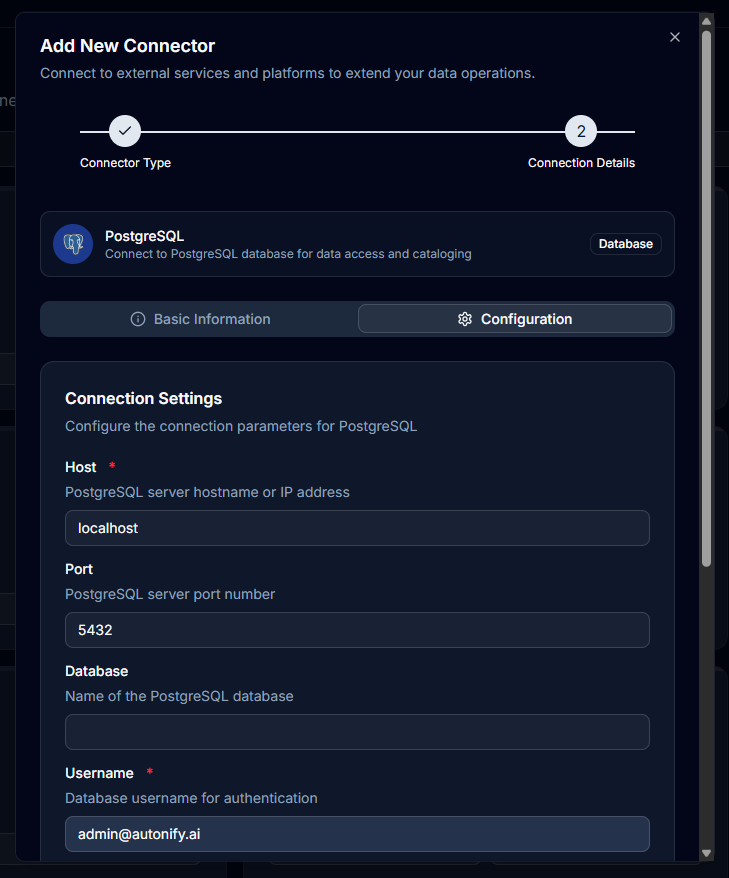
Step 4: Configure Connection Parameters
The configuration requirements vary by connector type and are defined by the connector's schema. The form dynamically adjusts based on the selected connector.
Common Fields (PostgreSQL example)
- Host: Database server address
- Port: Database port (default 5432 for PostgreSQL)
- Database: Database name
- Username: Authentication username
- Password: Authentication password
- SSL Mode: Connection security (disable, prefer, require)
Note: Each connector type has its own specific configuration schema with required and optional fields.
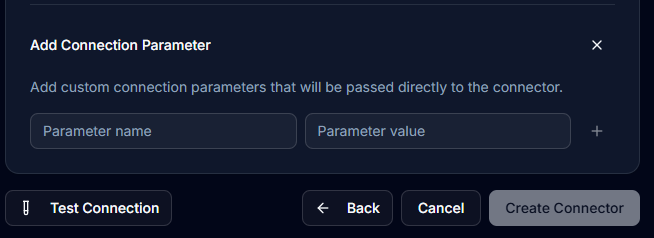
Step 5: Additional Parameters
For advanced configurations:
- Click Add Additional Connection Parameters
- Enter parameter names and values
- These extend the connection string for specific requirements
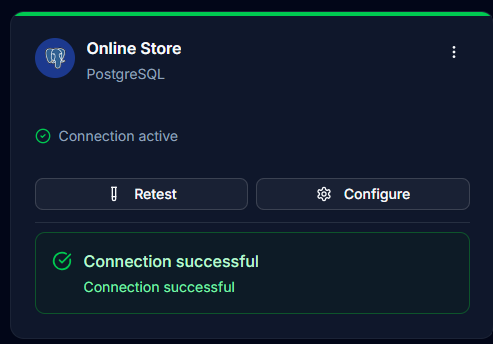
Step 6: Test Connection
Before saving:
- Click Test Connection button
- Wait for the connection test to complete
- Look for the green tick indicating success
- Review any error messages if the test fails
Step 7: Create Connection
Once the test passes:
- Click Create Connector button (or Update Connection if editing)
- The connector appears in your connectors list
- Connection is now ready for use
Managing Existing Connections
Testing Connections
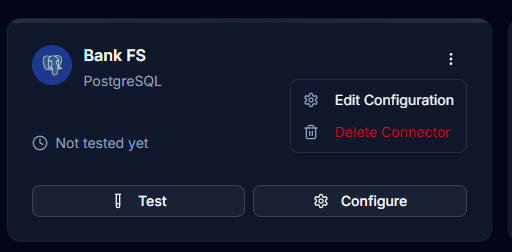
- Click the Test button on any connector card
- Verify connectivity at any time
- Useful for troubleshooting connection issues
Editing Connections
- Click the Edit button on a connector card
- Update configuration values as needed in the dialog
- Test the connection before saving
- Click Update Connection to apply changes
Deleting Connections
- Click the Delete button on a connector
- Confirm the deletion in the dialog
- Warning: Deleting a connector removes all associated data sources
Connection Parameters by Type
PostgreSQL
- Port: 5432 (default)
- SSL Options: disable, prefer, require
- Additional: Schema restrictions, connection pooling
MySQL
- Port: 3306 (default)
- SSL Options: Available
- Additional: Character encoding, timezone settings
SQL Server
- Port: 1433 (default)
- Authentication: SQL or Windows
- Additional: Instance names, encryption settings
Oracle
- Port: 1521 (default)
- Connection String: TNS or Direct
- Additional: Service names, SID configuration
Best Practices
Naming Conventions
- Use clear, descriptive names
- Include environment indicators (Dev, Staging, Prod)
- Follow organisational naming standards
Security Considerations
- Use dedicated read-only accounts when possible
- Enable SSL/TLS for production connections
- Store credentials securely
- Regularly rotate passwords
Performance Optimisation
- Limit database scanning scope when appropriate
- Use connection pooling for high-volume access
- Configure appropriate timeout values
- Monitor connection performance
Testing Strategy
- Always test connections before saving
- Retest after configuration changes
- Verify connectivity after network changes
- Document connection requirements
Troubleshooting Common Issues
Connection Failed
- Verify network connectivity to database server
- Check firewall rules and port access
- Confirm credentials are correct
- Ensure database user has required permissions
SSL/TLS Errors
- Verify SSL mode matches server configuration
- Check certificate validity
- Ensure proper SSL parameters in additional settings
Timeout Issues
- Increase connection timeout values
- Check network latency
- Verify database server performance
- Consider connection pooling
Permission Denied
- Confirm user has SELECT permissions
- Check schema and table access rights
- Verify database exists and is accessible
- Review role assignments
Next Steps
Once your connection is created:
- Create a data source using this connector
- Configure scanning to discover your data
- Set up scheduled scans for regular updates
- View your data catalog