Scanning Configuration
Learn how to configure and manage database scanning to track metadata and all assets within your data sources. Autonify automatically discovers tables, columns, attributes, constraints, indexes, and comprehensive metadata information.
📹 Database Scanning and Change Tracking
Discover how to configure scanning, track metadata changes, and maintain a complete scan history of your databases.
Understanding Scans
A scan in Autonify is the process of discovering and cataloguing metadata from your data sources:
- Automatic Scanning: Triggered immediately when a data source is created
- Metadata Collection: Gathers tables, columns, constraints, indexes, and more
- Change Detection: Tracks additions, modifications, and removals over time
- Historical Tracking: Maintains complete scan history for audit and analysis
Initial Scan
When you connect a data source:
- An automatic scan begins immediately
- The scan discovers all available metadata
- Results are registered in the Autonify portal
- The initial scan establishes your baseline catalog

Manual Scanning
Starting a New Scan
You can initiate a scan at any time:
- Navigate to your data source
- Click the Start New Scan button
- The scan begins processing
- Progress is tracked in real-time
The button also includes a dropdown menu for:
- Force Full Scan: Forces a complete rescan even if no changes are expected

Scan Types
- Standard Scan: Regular scan that may skip if no changes detected
- Force Full Scan: Complete discovery forcing rescan of all metadata
Scan Status
Understanding Scan States
Each scan can have various statuses:
- In Progress: Scan currently running
- Completed: Successfully finished
- Failed: Encountered errors
- Duplicate: No changes detected since last scan
- Queued: Waiting to start
- Cancelled: Scan was cancelled
- Cancellation Requested: Cancellation in progress
Duplicate Scans
When a scan detects no changes:
- Marked as "Duplicate" status
- Hidden by default in scan history
- Can be shown using the "Show duplicates" toggle
- Indicates your schema is unchanged

Viewing Scan Results
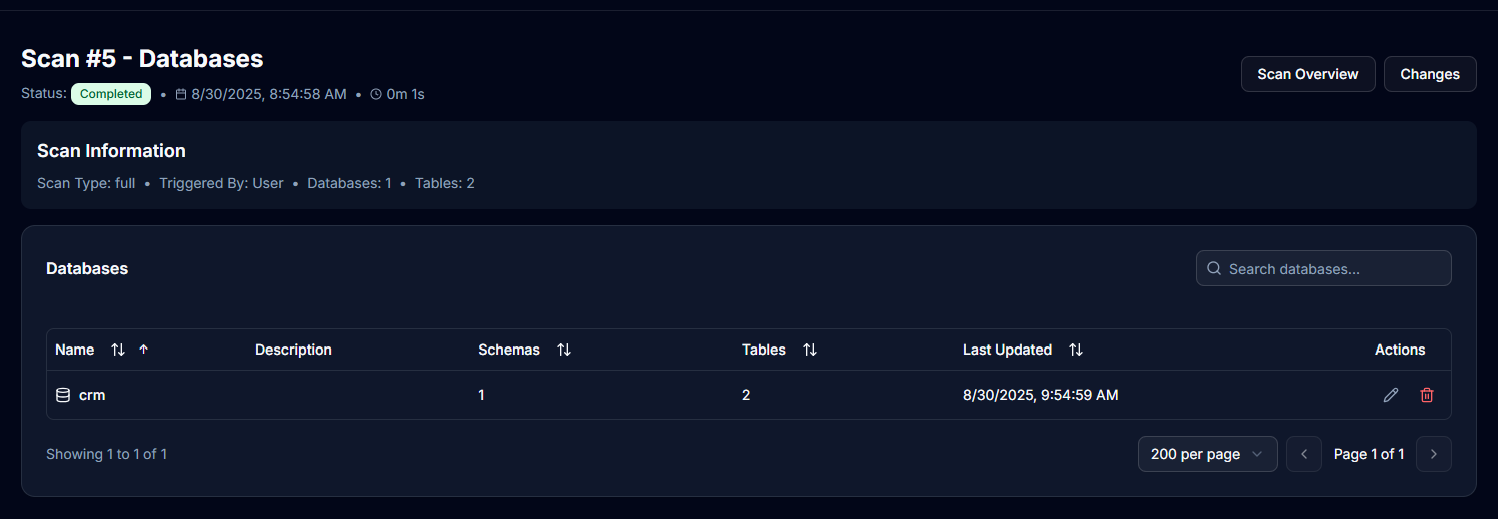
Scan Details
Access detailed scan information:
- Click View Details on any scan in history
- Review discovered databases and schemas
- Examine tables and columns found
- Check scan metrics and timing

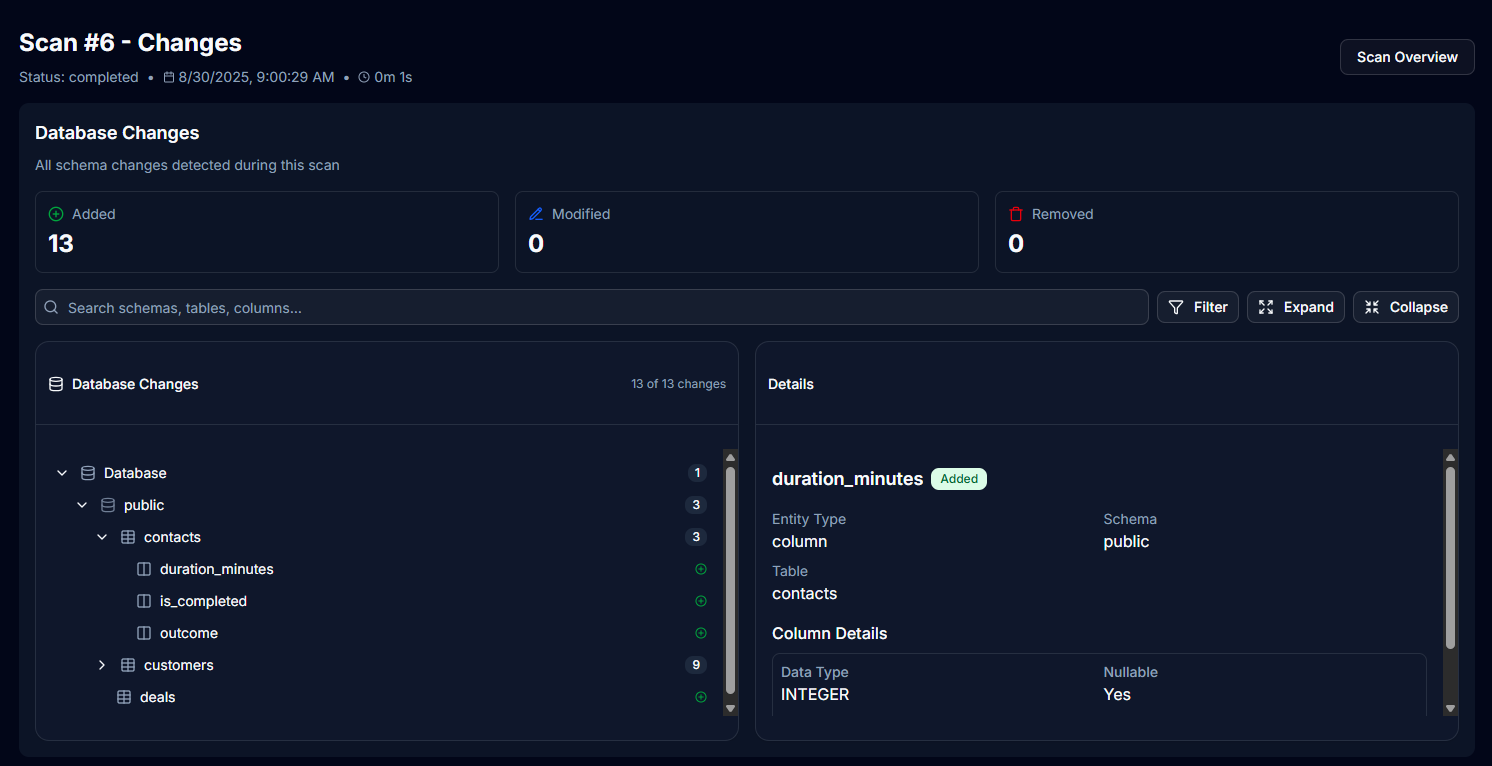
Change Tracking
Monitor schema changes over time:
- Changes are displayed directly in the scan interface
- Hierarchical view shows changes by database and schema
- Filter by change type (Added, Modified, Removed)
- View breaking changes separately
Change Categories
- Added: New tables, columns, or other objects
- Modified: Changed definitions or properties
- Removed: Deleted objects from the schema
![]()
Scan History
Accessing History
The scan history provides:
- Complete chronological list of all scans
- Scan ID, type, and timestamp
- Duration and completion status
- User who triggered the scan
- Quick access to scan details

History Features
Filtering Options
- Toggle duplicate scan visibility
- Sort by date, status, or duration
- Search for specific scan IDs
History Columns
- ID: Unique scan identifier
- Type: Full or incremental
- Started At: Scan initiation timestamp
- Duration: Time taken to complete
- Status: Current scan state
- Triggered By: User or system trigger
- Actions: View details link
Change Management
Tracking Schema Evolution
Autonify maintains comprehensive change tracking:
- Asset Count: Total objects discovered
- Tables Added/Modified/Removed: Table-level changes
- Columns Added/Modified/Removed: Column-level changes
- Constraint Changes: Primary keys, foreign keys, indexes
- Property Updates: Data types, defaults, nullability
Change Report Example
A typical change report shows:
249 new assets added
23 tables discovered
156 columns added
0 modifications
0 removals

Scan Performance
Factors Affecting Scan Duration
- Database Size: Number of tables and objects
- Network Latency: Connection speed to database
- Database Load: Current database activity
- Scan Scope: All databases vs specific database
- Permissions: Access rights to system catalogs
Optimising Scan Performance
Quick Scans
- Limit scope to specific databases
- Run during off-peak hours
- Ensure proper database permissions
- Use read replicas when available
Resource Considerations
- Scans are read-only operations
- Minimal impact on database performance
- Metadata queries use system catalogs
- No data content is scanned
Scan Configuration Options
Database Selection
Configure what gets scanned in the data source settings:
- Default Database Only: Only scan the database specified in the connection
- All Databases: Scan all databases accessible to this user
- Specific Database: Enter a specific database name to scan
Scan Triggers
Scans can be initiated by:
- Manual: User-triggered via UI using "Start New Scan" button
- Automatic: Initial scan when data source is created
- Force Full Scan: Manual trigger to force complete rescan
Best Practices
Scan Frequency
- Initial full scan on connection
- Regular scans to track changes
- More frequent scans for active development databases
- Less frequent for stable production systems
Managing Duplicates
- Keep duplicates hidden for cleaner history
- Show duplicates when troubleshooting
- Review duplicate patterns to optimise scan frequency
Change Monitoring
- Review changes after deployments
- Track unexpected schema modifications
- Document significant changes
- Use change history for audit compliance
Troubleshooting
Common Issues
Scan Failures
- Verify database connectivity
- Check user permissions
- Review error messages in scan details
- Ensure database is accessible
Missing Objects
- Confirm permissions to system catalogs
- Check database/schema filters
- Verify object types are supported
- Review scan scope settings
Performance Issues
- Reduce scan scope
- Schedule during low-usage periods
- Check network connectivity
- Review database performance metrics
Next Steps
After understanding scanning: