Roles & Permissions
Manage workspace access through roles, groups, and granular data permissions. This guide covers how to configure user groups, assign permissions, and control data access across your organisation.
📹 Roles and Permissions Management
Learn how to manage groups, assign roles, and configure data access permissions for secure workspace management.
Group Management
Groups provide a way to manage permissions for multiple users collectively. Groups enable efficient permission management and can be assigned to teams with specific roles.
Important: Only platform-level Admins and Owners can create and manage groups.
Accessing Groups
Navigate to the Groups section to view and manage all groups in your workspace.
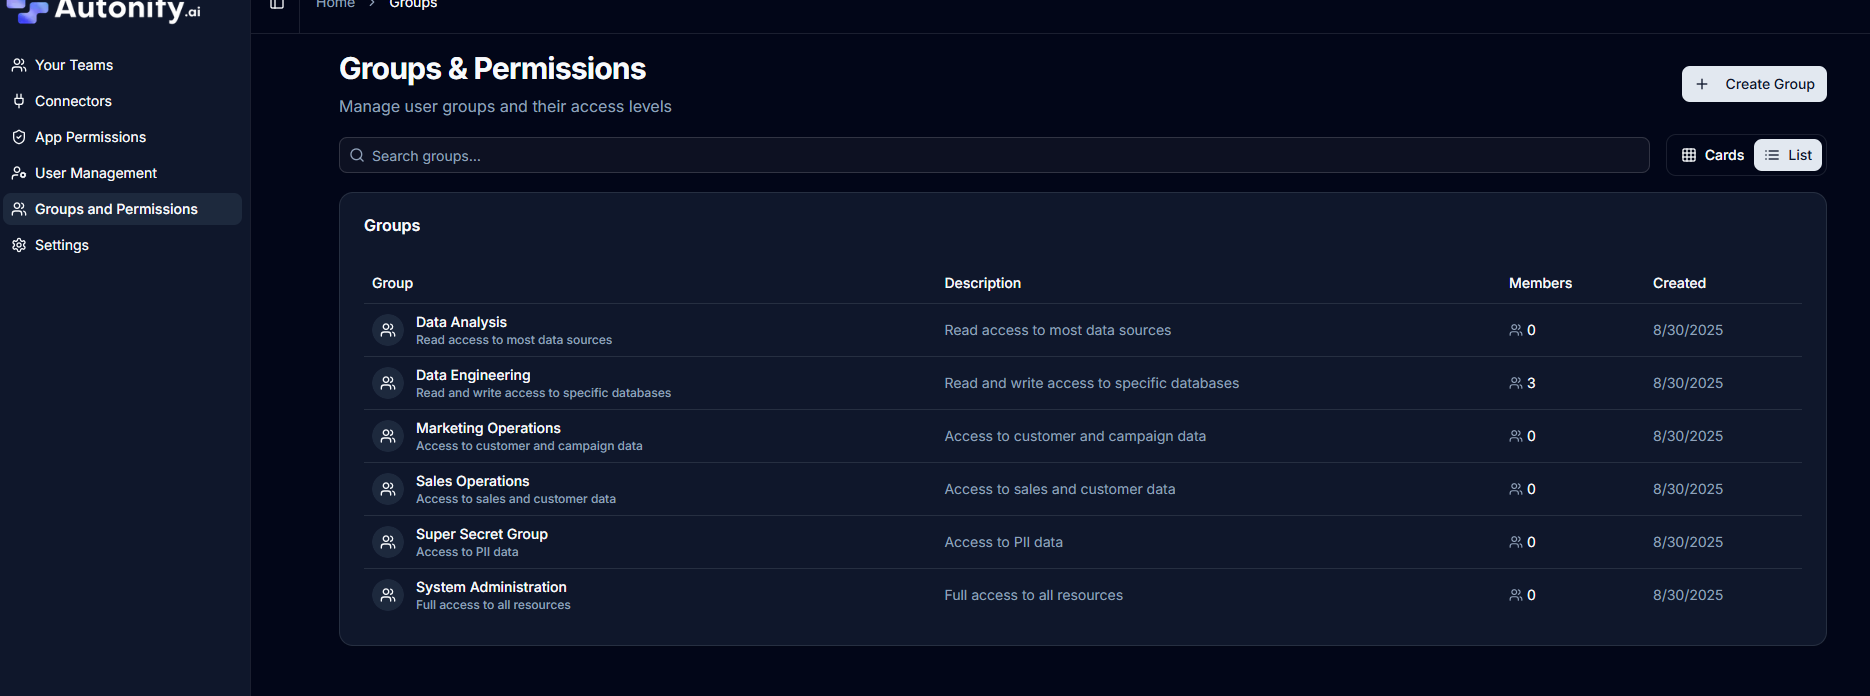
Managing a Group
Edit Group Details
- Select a group from the list
- Update the group name and description
- Click Save Changes to apply updates
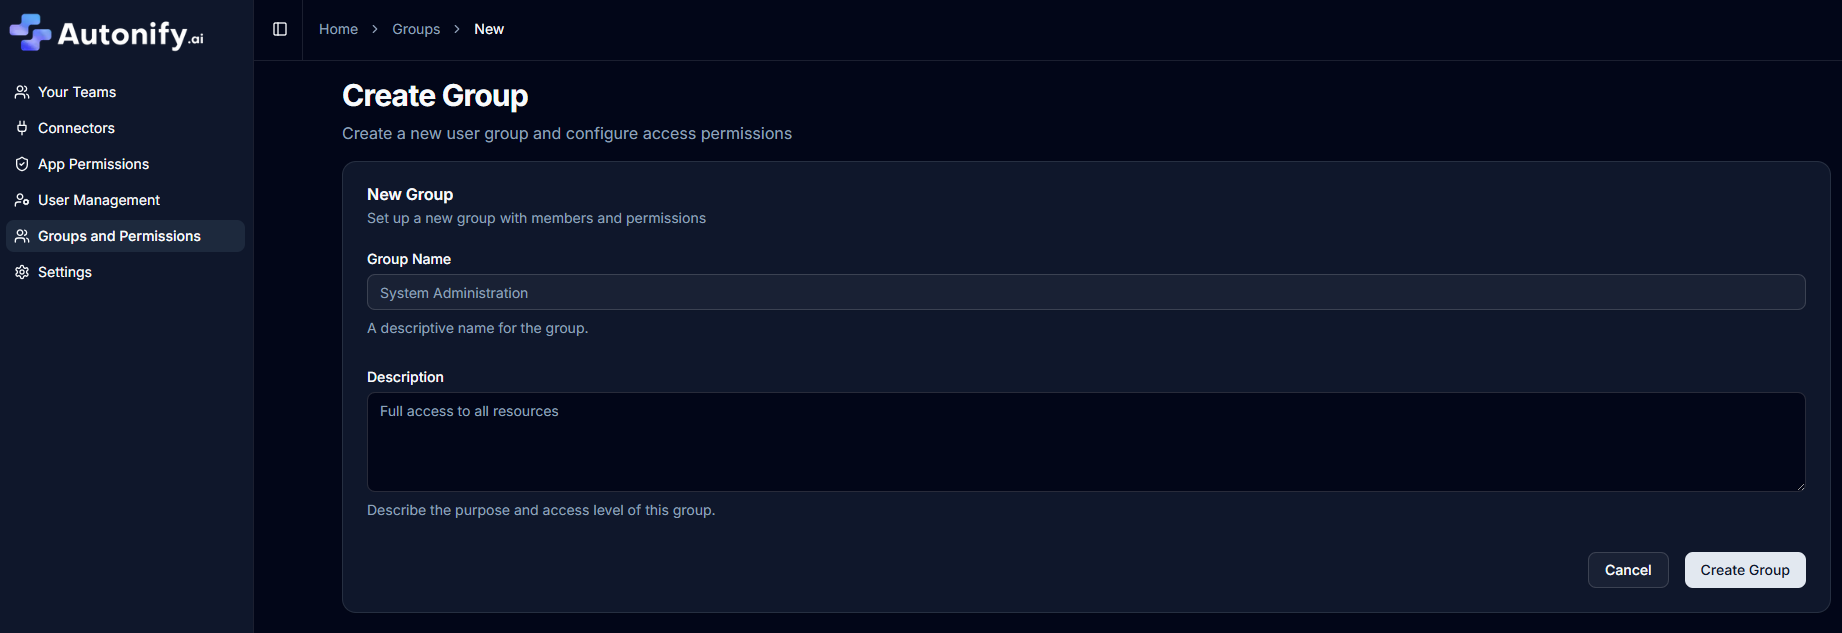
Delete a Group
- Navigate to the group details page
- Scroll to the "Danger Zone" section
- Click Delete Group button
- Confirm in the dialog that appears
- The group and all associated permissions will be permanently removed
Adding Members to Groups
Required Permission: Platform Admin or Owner
- Navigate to the group you want to manage
- Click Add Members button
- Choose between two methods:
- Select Users tab: Check users from the list
- Bulk Import tab: Paste email addresses (one per line)
- Click Add [N] Member(s) button to confirm
Note: Users inherit the highest permission level from all their groups.

Removing Members from Groups
- View the group members list
- Click Remove next to a member
- The user is immediately removed from the group

Column-Level Permissions
Control which specific columns users can access through group-based permissions. This provides fine-grained access control for:
- GraphQL API access control
- MCP (Model Context Protocol) data exposure
- Preventing sensitive data leakage to AI workflows
- Compliance with data privacy regulations
Configuring Column Access
Required Permission: Platform Admin only
- Select a group
- Navigate to Column Permissions
- Choose a data source
- Select specific tables
- Choose individual columns the group can access
- Save the permission configuration
Note: If no column permissions are set, users can access all columns in tables they have access to through team membership.
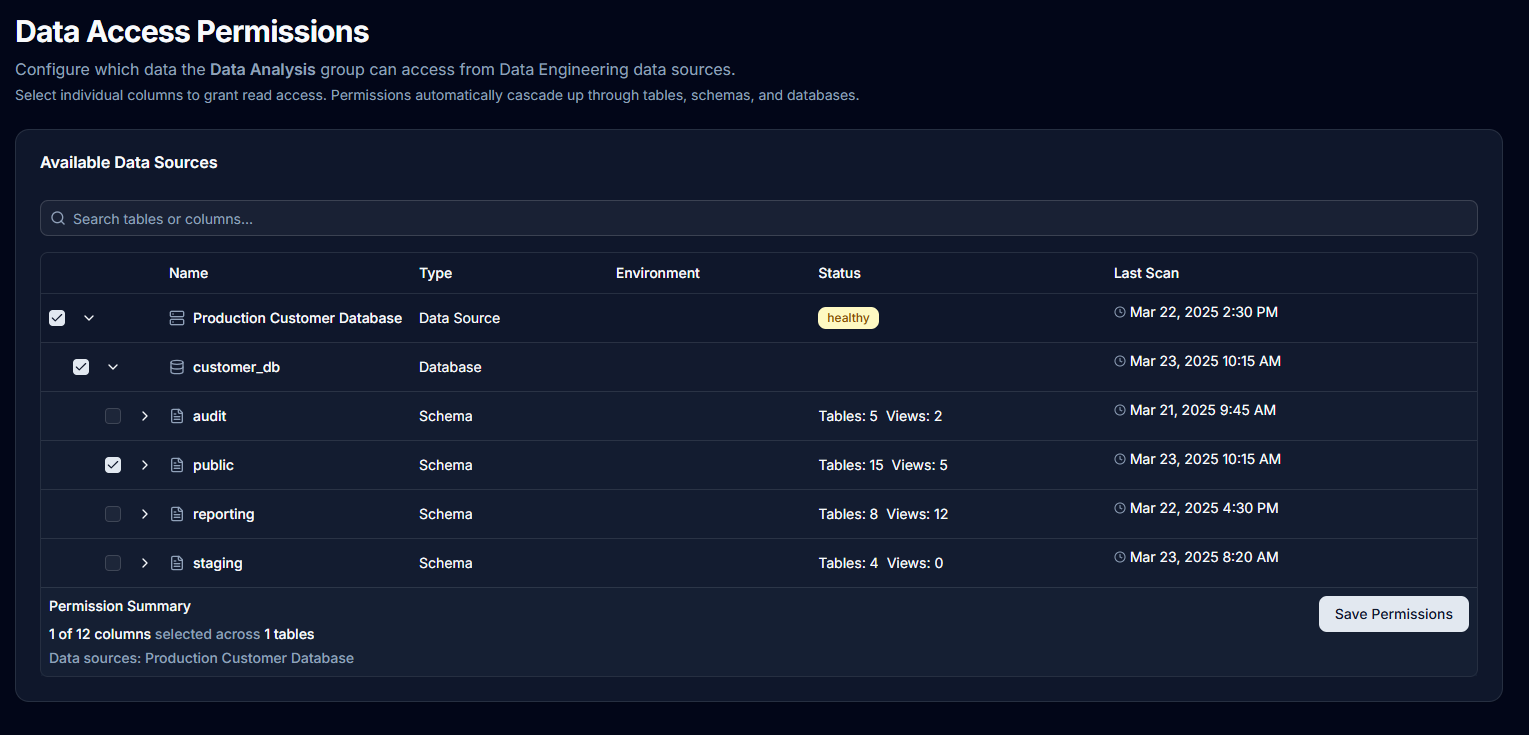
Permission Scope
Column permissions control:
- Column Visibility: Which specific columns users can see
- API Access: Columns available through GraphQL/REST APIs
- MCP Exposure: Data available to AI assistants
- Inheritance: Users get access through group membership
Note: Column permissions work alongside team-based access. Users must have team access to the data source first.
Use Cases
GraphQL API Access
- Restrict API consumers to specific data sets
- Ensure teams only access their authorised tables
AI and Chat Integration
- Prevent sensitive fields from being exposed to LLMs
- Control which data can be used in AI workflows
- Protect PII and confidential information
Application Permissions
Manage what users and groups can do within the Autonify platform itself.
Permission Levels
Application permissions determine platform-wide access:
- Owner: Full platform control, first user gets this automatically
- Admin: Can manage users, groups, and access all teams
- User: Standard access, can create teams and access assigned resources
Permissions can be assigned:
- Directly: To individual users
- Via Groups: Users inherit permissions from their groups
Managing User Permissions
View Current Permissions
- Navigate to Application Permissions
- View the Users tab for individual permissions
- View the Groups tab for group-based permissions
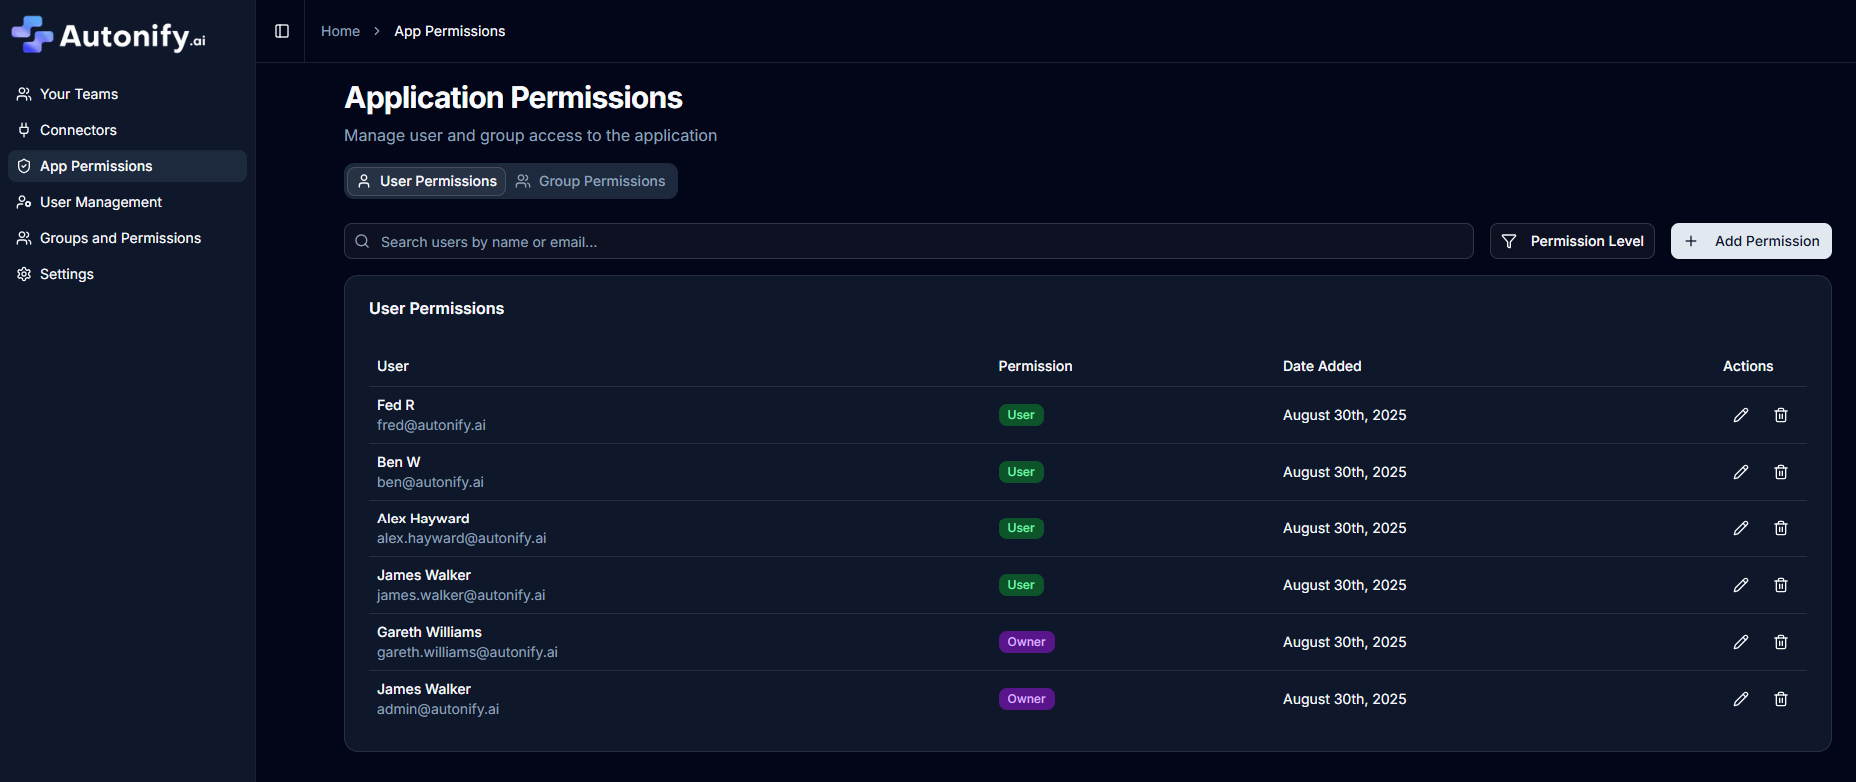
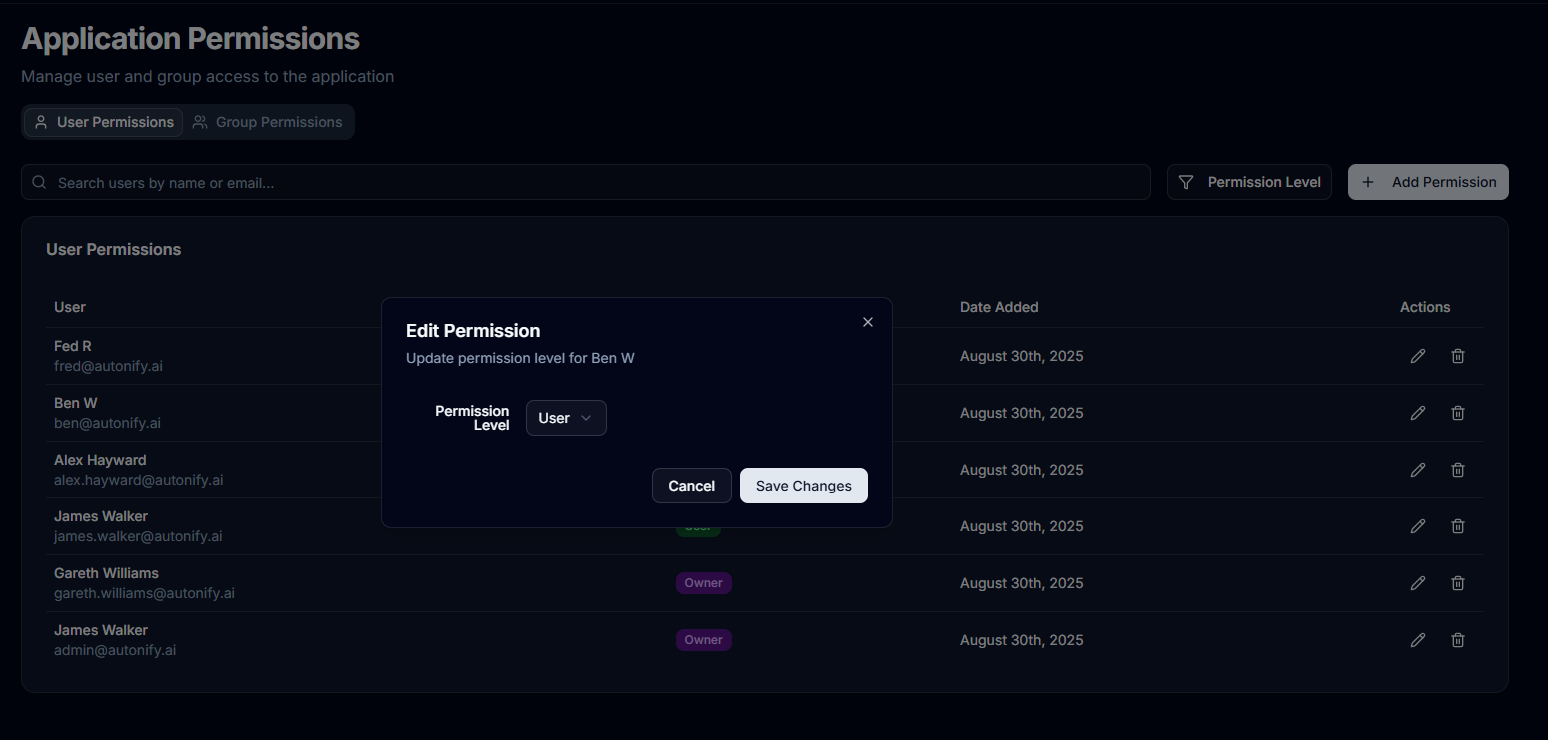
Change User Permission Level
Required Permission: Platform Admin or Owner
- In the Users tab, find the user
- Click the Edit icon button
- In the dialog, select the new permission level:
- Owner: Full platform control
- Admin: Manage users, groups, and all teams
- User: Standard access to assigned teams
- Click Save to apply the change
Note: Platform Admins cannot modify Owner permissions.
Add User Permission
- Click Add User Permission button
- Select a user from the dropdown
- Choose their permission level
- Click Add Permission to confirm
Platform vs Team Roles
Platform-Level Roles
Owner
- Full control over the entire platform
- Can manage all users and groups
- Access all teams regardless of membership
- Configure platform-wide settings
- First user automatically gets Owner
Admin
- Manage users and groups
- Access all teams regardless of membership
- Cannot remove platform Owners
- Configure most platform settings
User
- Standard platform access
- Can create new teams
- Access only assigned teams
- Cannot manage platform users or groups
Team-Level Roles
Team Owner
- Full control over the specific team
- Can delete the team
- Manage team members and data sources
- Run all agents and scans
Team Admin
- Manage team members and data sources
- Run agents and scans
- Cannot delete the team
- Cannot remove Team Owners
Team User
- View and query data sources
- Cannot run agents directly
- Cannot modify team settings
- Read-only access to team resources
Best Practices
Group Organisation
- Create groups based on departments or projects
- Use descriptive names that indicate the group's purpose
- Document group permissions in the description
- Regularly audit group membership
Data Security
- Apply principle of least privilege
- Restrict sensitive data access to specific groups
- Regularly review data permissions
- Use field-level restrictions for PII
Permission Management
- Use groups for bulk permission management
- Reserve individual permissions for exceptions
- Document permission changes
- Perform regular access audits
AI and MCP Considerations
- Carefully control data exposed to AI models
- Create specific groups for AI/chat access
- Exclude sensitive fields from MCP exposure
- Monitor data usage through audit logs