Team Settings
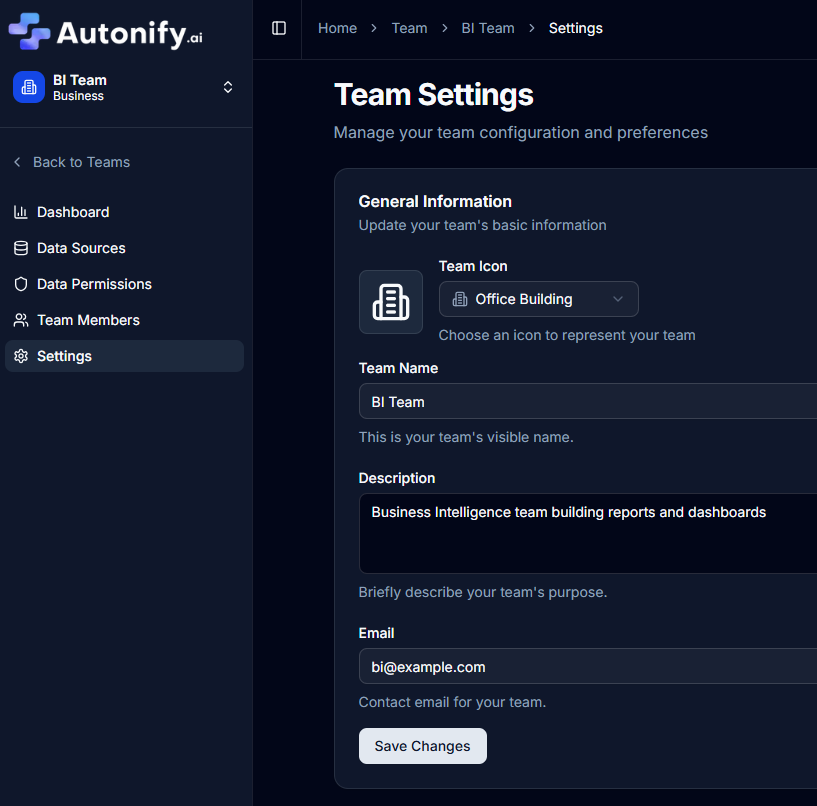
Configure and manage your team's settings, including team information, visual identity, and data source organisation. Teams provide a way to organise data sources and control data permissions across your organisation.
📹 Managing Team Settings
Learn how to configure team settings, update team information, and manage team organisation in Autonify.
Understanding Teams
Teams are a fundamental way of organising data in Autonify:
- Control data source access and permissions
- Organise users into logical groups
- Manage who has access to specific data sets
- Maintain separation between different departments or projects
Each team can have multiple data sources assigned to it, and team members inherit access to those data sources based on their role within the team.
Accessing Team Settings
Required Permission: Team Admin or Team Owner
- Navigate to your team from the teams list
- Click on Settings in the team navigation menu
- The settings page displays all configurable options
Note: Team Users cannot access or modify team settings.

General Settings
Team Icon
Select a visual icon to represent your team:
- Click the icon dropdown selector
- Choose from categories:
- Business: Briefcase, Building, Finance icons
- Team: Users, Groups, Collaboration icons
- Data: Database, Charts, Table icons
- Other: Global, Network, Dashboard icons
- The selected icon displays next to your team name
![]()
Team Name
Update your team's display name:
- Enter a clear, descriptive name (2-50 characters)
- This name appears throughout the platform
- Example: "Data Engineering Team"
Team Description
Provide context about your team:
- Enter a brief description (up to 500 characters)
- Describe the team's purpose and responsibilities
- Example: "Responsible for data infrastructure and analytics pipelines"
Contact Email (Optional)
Set a team contact email:
- Must be a valid email format
- Provides a point of contact for the team
- Example: "data-team@company.com"
Saving Changes
Required Permission: Team Admin or Team Owner
After making updates:
- Click the Save Changes button
- Changes apply immediately
- All team members see updated information instantly

Advanced Settings
The Advanced Settings section is displayed below the General Settings and contains irreversible actions that should be used with caution.
Danger Zone
A warning alert is displayed highlighting the permanent nature of actions in this section.
Deleting a Team
Required Permission: Team Owner only (or Platform Admin/Owner)
Warning: Deleting a team is permanent and cannot be undone.
When you delete a team:
- The team is permanently removed
- All data sources under the team are deleted
- All team member associations are removed
- Historical data and configurations are lost
- All agent configurations and run history are deleted
- MCP configurations for the team are removed
Delete Process
- Navigate to Team Settings
- Scroll to the Advanced Settings card
- In the Danger Zone section, click the Delete Team button
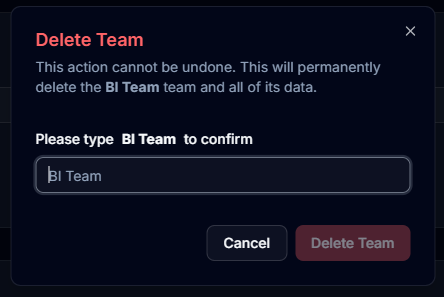
- A confirmation dialog appears:
- Type the exact team name in the input field
- The Delete Team button remains disabled until the name matches exactly
- Click Cancel to abort or Delete Team to proceed
- Upon successful deletion, you will be redirected to the team selection page

Data Source Management
Required Permission: Team Admin or Team Owner to manage data sources
Teams can manage multiple data sources:
- View the count of data sources assigned to the team
- Add new data sources through the Data Sources section
- Remove data sources when no longer needed
- All team members can view and query data sources
- Only Team Admins and Owners can create or modify data sources
Best Practices
Team Organisation
- Use descriptive team names that clearly indicate purpose
- Keep team descriptions updated
- Assign appropriate icons for visual identification
- Regularly review team membership and data access
Contact Information
- Maintain accurate contact emails
- Use group emails rather than individual addresses
- Update contact information when team leads change
Security Considerations
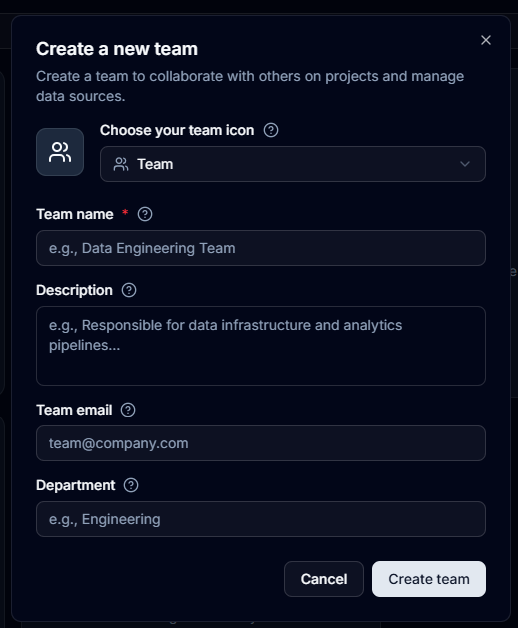
- Any platform user can create teams (becomes Team Owner)
- Regularly audit team access to sensitive data sources
- Document team purpose and data access requirements
- Consider data source reassignment before team deletion
- Use column permissions to restrict sensitive data access
Before Deleting a Team
- Export any important data or configurations
- Document data sources that will be affected
- Notify team members in advance
- Consider archiving instead of deletion
- Verify no critical processes depend on the team's data sources